Vintage Ruler & Tape Measure Jewelry

There was an article in the Autumn 2011 issue of GreenCraft Magazine about making jewelry from vintage rulers. As soon as I saw it I knew I had to try making my own. I don’t make jewelry very much; I figure I’ve got enough crafts to do already, but I do own the basic equipment needed, and do it on rare occasions.

This jewelry brought me right back to my childhood. My dad was a carpenter his entire working life, and as a child I remember he almost always carried around a folding, accordion-style wooden rulers. I vaguely recall that his back pants pocket even wore out around the shape of the ruler, just as a cowboy’s jeans might wear out around his can of chewing tobacco in his back pocket.

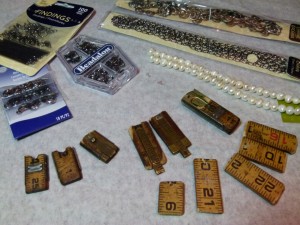
I hopped on eBay and quickly found a cheap wooden ruler just like my dad’s, and also an old fabric wind-up tape measure. I think I paid $5 for each of them. I looked through my box of jewelry making supplies, and while I was waiting for the packages to come, I stocked up on a few more things I thought I might need.

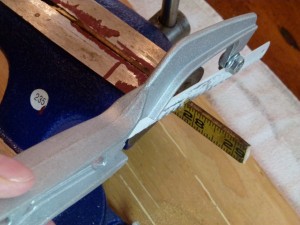
Once everything arrived I gathered all my supplies, including my portable vice. Since I don’t have a workbench, I secured my vice to a big piece of plywood. this works well for me because it’s portable . I stick it down on a dishtowel so it doesn’t scratch any surfaces. I also gathered my dremel drill with my attachment box.
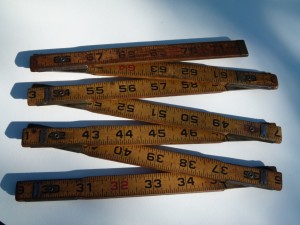
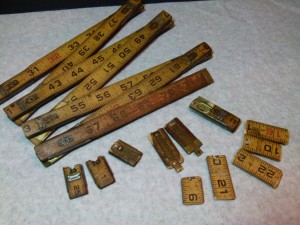
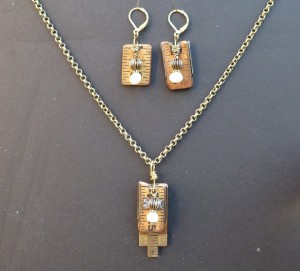
Now I’m not here to teach you how to make jewelry. I just wanted to show you what’s possible with an old ruler and a few beads. Are those age spots on my face? 
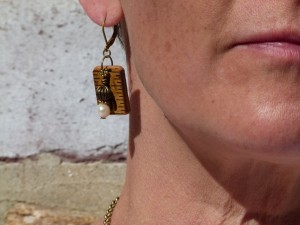

And we’re just going to completely ignore the fact that in my ever-increasing age the skin on my neck is now starting to resemble a plucked chicken.
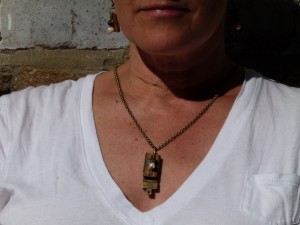
Vintage Ruler Necklace
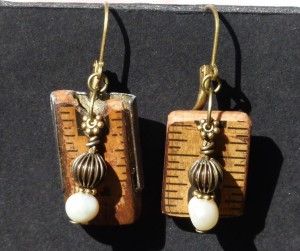
The Finished Vintage Ruler Earrings

Then, since I loved the way this set came out I made some more.This time I added some cool brass components’s with a yellow patina I got on an Etsy shop and some brass hearts I found at my local bead store along with pearls.
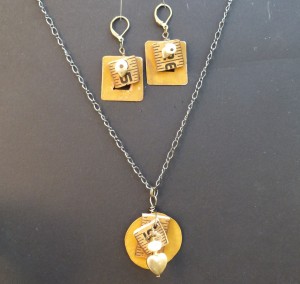

And to finish either set off I made a bracelet to go with them.
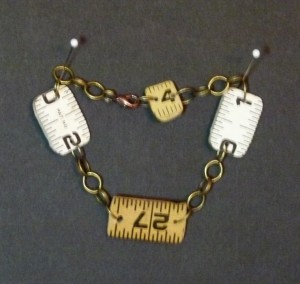

And then for kicks I made a bangle bracelet with some of the fabric tape measure. First I took a page out of a carpentry book I had to use for covering the bracelet. It’s something most people probably wouldn’t notice, but I thought it was cool to try and tie the tape measure back to construction with something like that. I wrapped one of the large wooden bangle bracelets I had leftover from my Sweater Covered Bangle Bracelet project with strips of the book page I’d cut up, using matte medium to adhere the pieces. (you can use Modge Podge or anything similar to that.). When that was dry I used a high-tack, quick-drying, clear craft glue to adhere a strip of the fabric tape measure around the middle of the bracelet. When that was dry I first used a matte varnish on the bracelet to seal it, but didn’t find that looked right so I applied a gloss varnish and loved the way it came out.
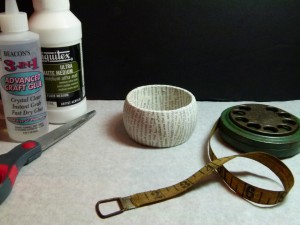
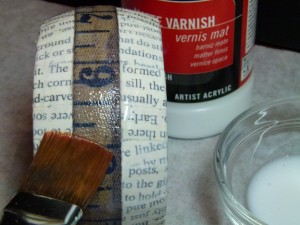
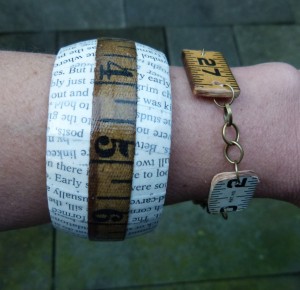
My vintage ruler & tape measure bracelets.


That’s a pretty “green” jewelry project. You can make lots of jewelry from a single vintage folding ruler or cloth tape measure.

Pin It
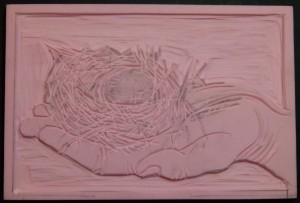
A Nest in the Hand is Worth Two in the Bush?

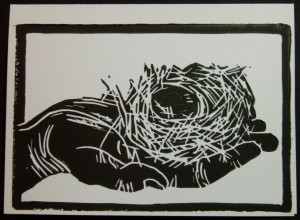
I didn’t have much time on my trip to Lexington to work on Linoleum prints like I’d hoped, but I did manage to get one finished and printed it yesterday. A nest in the hand. I love the way it came out. Unfortunately, I’m not sure which category it’s going to fit into in my series of cards, but I’ll find somewhere for it.

Nest in the Hand Linoleum Cutting before printing.


Nest in the Hand Linoleum Print Card


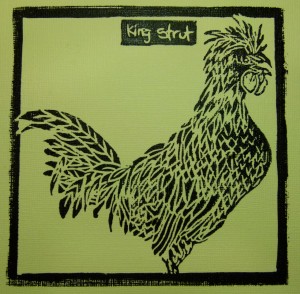
And while I had my printing stuff out, I printed out my King Strut again on some less textured paper, and he came out much better than the original print. Someday I’m going to break out my silk screening equipment and I hope to do a series of pillows and maybe hand towels from my larger prints.

King Strut final print.

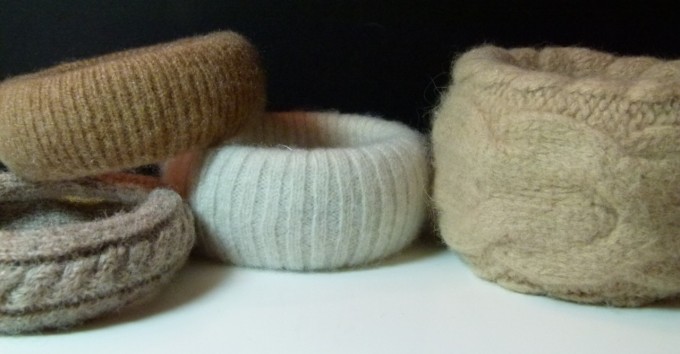
More Sweater Covered Bangle Bracelets

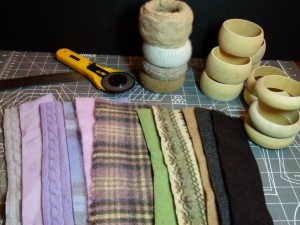
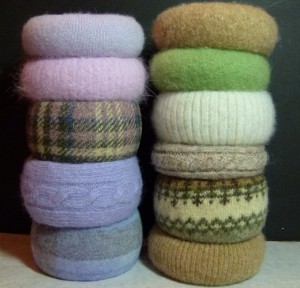
I found some great plain wood bracelets made for crafting purposes on Etsy here, and had gathered some more felted sweaters together to make some more sweater-covered bangle bracelets before I left for Kentucky, and tried desperately to get them done before I left so I could post them while away, but at 2 a.m., with everything done but covering the bracelet, I finally had to give up and get a few hours sleep. 


I did manage to finish them last night, with the final ones being done this morning.


These are so easy to make if you follow my directions here.

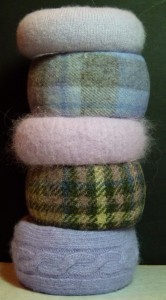
The plaid ones were made with felted wool fabric I found at a knitting store a couple of months ago. You can find bundles of similar beautiful wools at PurlSoho.com. The bundles are expensive, but you can use them for a variety of crafting projects.

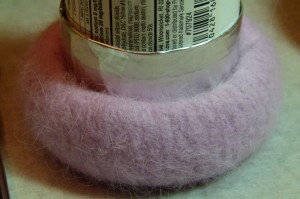
I figured out another good way to leave them while the glue dries: I wrapped a bottle of aspirin that was slightly smaller than the inside dimension of the bracelet with some layers of non-stick aluminum foil so it fit tightly inside the bracelet. This allowed the two seams of the bracelet to dry being pressed flat against the inside of the bangle and made a neat finished product.

A bottle wrapped in non-stick aluminum foil helped keep the seams flat while the glue was drying.


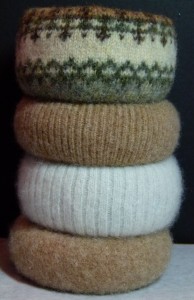
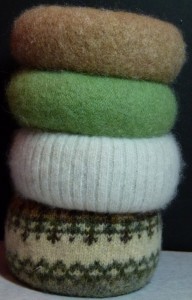
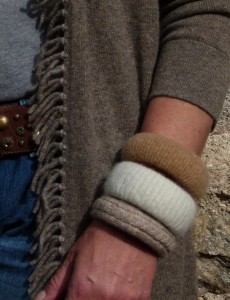
A lot of the neutral colors can be mixed with so many other colors, and I love the look of that patterned sweater bangle.


The patterned bangle goes well with the cream and browns as well as with this green one.


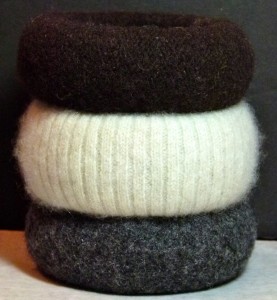
And I love this almost black color with the dark smoky grey and the cream.


I’m going to a Jackson Browne concert on Saturday night. Maybe I’ll be sporting some of my fancy new bangle bracelets!

Pin It

Meet Antonio

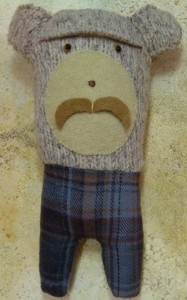
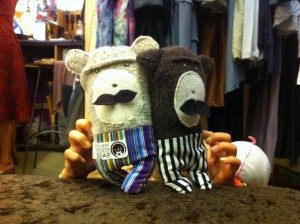
This is Antonio. He is the brother of Ramone and Luigi. He has come over from the old country to visit his brothers.


Really though, my daughter Maia has two favorite stuffed animals. I know. She’s 11. But we live in a magical world here at my house, and Charles and Ramone are important members of our family.

Maia never gave two hoots about stuffed animals. Ever. She would get them as gifts for her birthday or for Christmas and she would carry them upstairs, throw them in some corner and never look at them again. We finally stopped giving any to her, and told friends and family not to either. She just didn’t care for them.

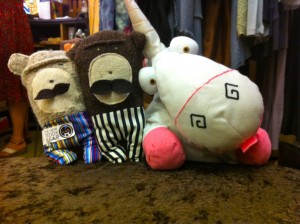
Two summers ago we were in Wyoming when the movie Despicable Me came out, and in it was this stuffed unicorn. At the Teton County Fair that summer, Maia saw this unicorn from the movie at one of the games there, and she had to have him. She named him Charles, and for whatever reason, he was different than all the other stuffed animals before him. He was special.

Earlier this summer Ramone came into our life. We found him up in Kent, Connecticut at this wonderful store up there.

Luigi, Ramone & Charles

When we went back to that store at the end of the summer, we purchased the remaining stuffed animal like Ramone, and this became Luigi. Charles isn’t willing to share Maia full-time with anyone other than Ramone, so Luigi lives on my bedside table.

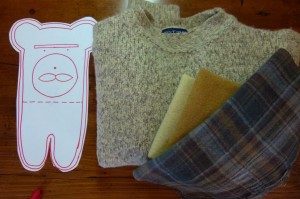
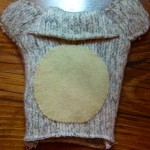
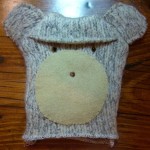
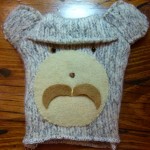
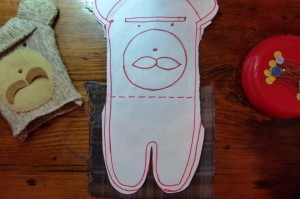
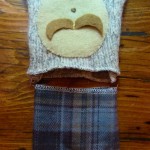
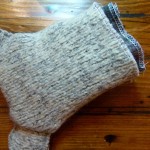
I decided I wanted to try and make something like Ramone and Luigi. He’s a simple shape, and I have lots of old felted sweaters, wool felt and wool scraps.

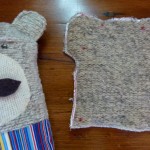
Now for his pants.

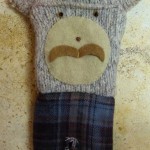
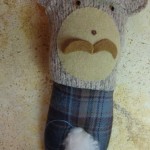
The finished Antonio. He rotates between all of the kids.


I think he came out pretty close to the way Ramone and Luigi look. He’s a little long in the waist and he’s got more a body-builder’s type body than the others, so we call him the younger, more fit, brother.

Luigi and Ramone

A Tribute to King Strut

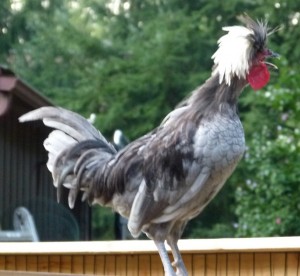
King Strut, my beautiful Blue Crested Polish rooster.


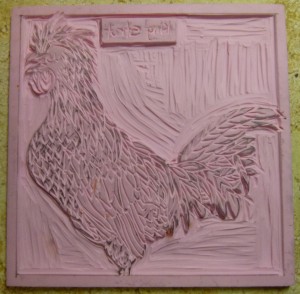
I was in a huge rush to leave for New York today, but wanted get at least one print made of this new linoleum cutting I did of King Strut. Because this was a bigger size linoleum than I normally use, I did not have the proper kind of paper to print it on; it was much too textured for a print like this, but at least you'll get the general idea of what it looks like.


Sweater Covered Bangle Bracelets


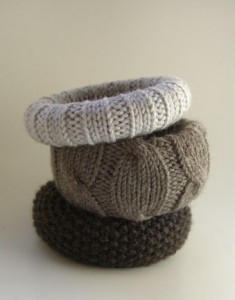
I saw this great pin on Pinterest.com the other day for these terrific looking knitted bangle bracelets by leftcoastknits.

Ravelry.com's knitted bracelet cuffs

Now I can knit, and I used to knit a lot, but I was I could never get beyond the basic knit and purl stitches. No complicated cables and rope stitches for me. And since I was usually knitting something for felting, that was all I needed to know. If you can do these fancy stitches, then just click the link to Ravelry.com and happy knitting!

For those less coordinated readers, you might want to try what I did with similar results to the Ravelry knit ones.

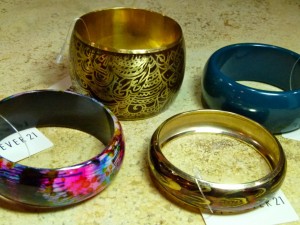
First I dragged the kids to the mall and went in search of cheap bangle cuff bracelets. The cheapest ones I could find were at Forever 21, so I picked up 4 of them in varying widths. It doesn’t matter how ugly they are since you’ll be covering it up.

I’m always scouring the local thrift shops for inexpensive wool or cashmere sweaters for a few dollars a piece. Sometimes I’m lucky enough to find a good one that will fit Amanda and I send it down to her at college, but mostly I buy them to felt, so it doesn’t matter if it’s got a few moth holes or it’s already a little mis-shapen from an unexpected trip in someone’s washing machine. I throw them in the wash on the hottest setting and they naturally felt up and bind together. I’ve got a big project I plan on working on this winter with all of the sweaters I’ve been collecting and my new overlock sewing machine.

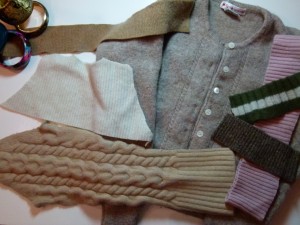
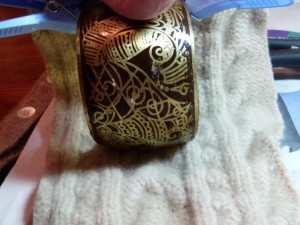
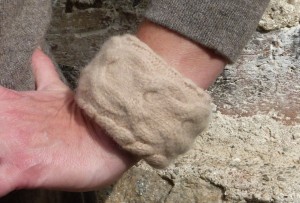
But in the meantime, I knew I had some great sweater scraps from previous projects that would be perfect for this project, so I pulled out some sweater pieces in the colors I had in mind, matching them to the bracelets. I had just picked up a nice wool cardigan at the thrift store that I’d felted already, and it had a nice small cable going down the front of it that would be perfect for the final bracelet.

I matched up the bracelets with the sweater scraps.

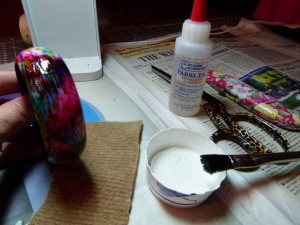
Then I got my work area prepared. I needed fabric glue, (I used Beacon Adhesive’s Fabri-Tac glue, which worked really well), inexpensive or disposable brushes for the glue, (I buy these by the bag for my woodworking projects), good fabric scissors and some craft scissors.

Gather all of the materials you'll need before you start. This glue dries quickly and you have to work fast.

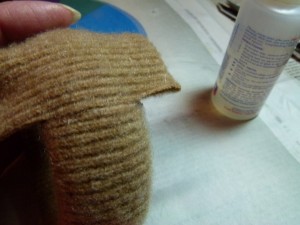
Then, once I decided which bracelet size was most appropriate for which sweater piece, I started. Taking the first bracelet and sweater piece, I made sure that the edge of the sweater piece was straight. Then I measured roughly for length by wrapping it around the bracelet and cutting the piece a little long. I did the same for the width – rolling the fabric inside the bracelet and cutting it a little long. My goal was to join the middle seams if possible inside the bracelet.


Then I started by applying glue on about half of the outside of the bracelet. At first I had put the glue in a paper cup to use, but I found that squeezing it directly onto the bracelet was easier. Lay the sweater piece on your work surface and, starting at the beginning of the glued area, roll the bracelet over the fabric, bring careful to keep the sweater straight as you roll.


Repeat with the second half of the bracelet. When you get back to where you started, carefully cut the sweater so your end seams but together. You may need to apply a little extra glue to get a good, tight seam.


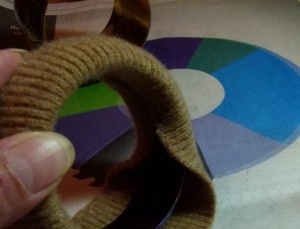
Now apply glue to the inside of the bracelet. I found this easiest to do one side at a time, and I did seem to have to trim a little triangle off of the seam corners to get it to fit properly. It’s OK if your seams don’t but together perfectly on the inside, but you don’t want them to overlap.


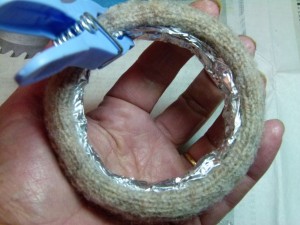
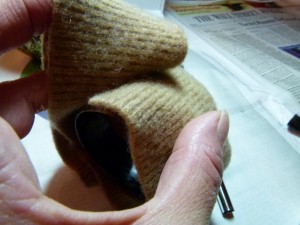
One of the bracelets wasn’t flat on the inside, but had a concave shape to it. For this one in particular I found it helpful in the short drying time to wad up some non-stick aluminum foil and press it into the center of the bracelet. Some clothespins were helping in keeping it in place while it dried. If you’re having trouble keeping any seam down you might want to try something like this technique.


That’s it! I finished 4 bracelets in less than an hour. Now I’ve got some great bangles to wear with this new sweater I bought for fall.


Pin It
Hand Painted Porcelain Dishware


When I saw a post on — where else — Pinterest, for using something called a porcelain pen on china that you then bake in the oven and it becomes permanent, I thought to myself  I had to try that. I found one brand called DecoArtGlass Paint Marker at Joan’s Craft Stores, and I found the Uchida DecoColor Opaque Paint Market at my local Jerry’s Artarama, but any opaque oil-based paint marker should work.

Now why weren’t these pens around 16 or 17 years ago?

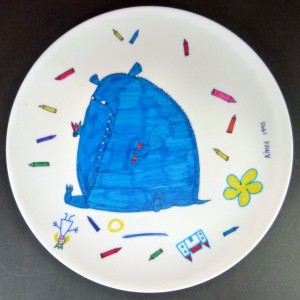
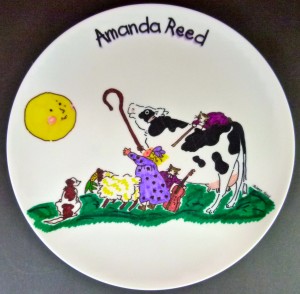
When Amanda was young, maybe 5 or so, for her birthday party I asked each child what their favorite book was on the invitations. For their party favor, I used one of those kits where I drew my picture freehand on the melamine plate they provided and send it into the company where they somehow treat it and made the design permanent. At the party the children got to use their new plate for the birthday cake, and then they got to take it home and use it again and again. For years after that moms would stop me to say that their child still used that plate all those years later.

I was so excited when I looked and found I still had some of these plates tucked away.

A picture from the book The Strange Blue Creature by

And to prove how old I'm getting, I cannot even remember the name of this book!

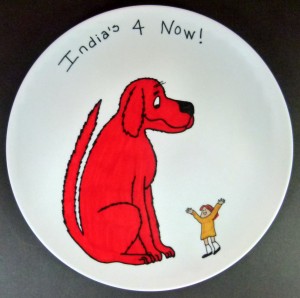
And I must have done this plate for India's 4th birthday.

The problem with a project of this magnitude, just like the dreaded “Lunch Bags” became, is that while they were pretty significant undertaking with one child, they were impossible to tackle when I had two, let alone when 2 turned into 4. My younger kids still feel like they got the short end of the stick in life because they didn’t get hand-painted lunch bags to take to school every day or custom cake plates to send home with their friends at their birthday parties.  So use this page for inspiration, or for a good laugh. Oh, and if you actually manage to paint custom lunch bags or plates as party favors and you have more than one child, drop me a note because I want to personally tell you that you are amazing.

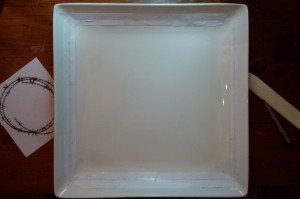
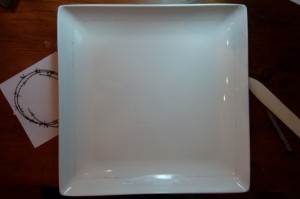
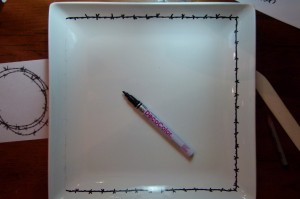
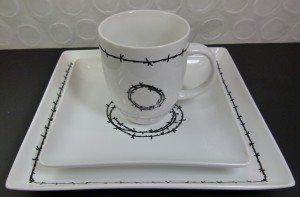
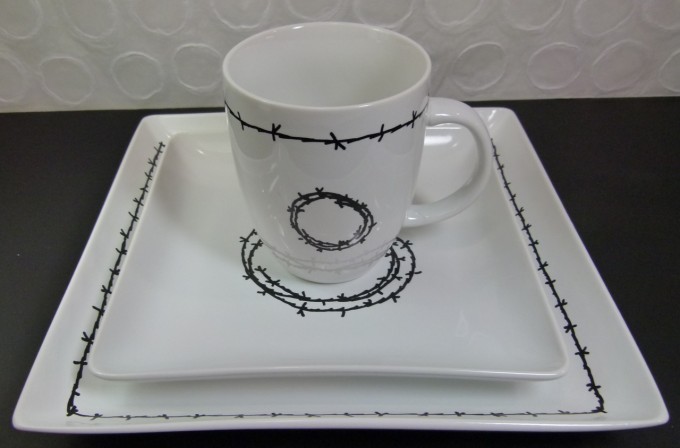
So I bought  dinner plate, salad plate and coffee cup at Target. Simple white porcelain. Dishwasher and microwave safe. I removed all stickers and washed it well. I knew I wanted a simple design. While the pens claim to be “fine point”, it would be hard to do something very detailed with one on a plate. I chose barbed wire for some strange reason. Must  be the Wyoming in me. I went to the trust internet and printed out some images of barbed wire so I had a general idea of what it should look like in detail, measured the area where I wanted it on the plate, and drew the design to fit the areas. I did 4 separate strips of wire to go around the outside of the dinner plate. I used the same sized circular wire design on the center of both plates, but shrunk it on my printer/copier for the coffee cup layout. The circular wire around the top edge of the coffee mug I did freehand.

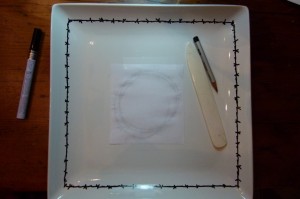
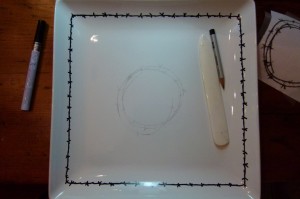
A technique I learned the hard way while teaching myself to do linoleum cutting is to use paper, a #2B or #4B art pencil and a bone folder to transfer designs easily onto another surface. What is a bone folder you ask? I did too. Sounds like something a serial killer keeps in his handy tool kit, doesn’t it. Well, it looks a bit like a letter opener and it is actually made out of bone. You can find it at most craft or art supply stores.


It’s such a simple concept, yet when I first realized I could transfer images this way I felt like crying at all the time I’d wasted using other methods.

Take your pencil drawn design and lay it in the desired area on the porcelain piece. Tape it securely down all around. Using the bone folder, rug all over the image, pressing firmly. Lift a corner to see if design has transferred, and if not, rub the image some more until you can see the image pretty clearly. Now I did find that it was hard to transfer onto the porcelain surface, but it did transfer lightly, which was all I really wanted in this case. This method works great when transferring my designs onto linoleum.

Design is taped around outside edge of plate.

Design is transferred onto plate with bone folding tool.


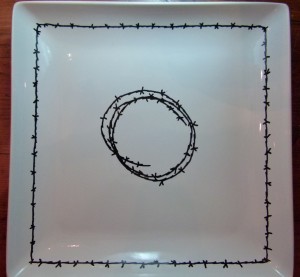
Then I just took a black porcelain pen and carefully traced over my design. The paint dries pretty quickly, but use caution not to smudge anything.

Using the pen, I just drew over the transferred pattern, being careful not to smudge anything.


I used the same method to transfer the center design when the outside was dry.

Transfer the design with a bone folding tool.


The transferred design.


The finished plate.


I just continued this with the salad plate and the mug until I had a finished set.

The finished set.


Now in my spare time I just have to do 5 more sets.

Sewing Kit in a Canning Jar

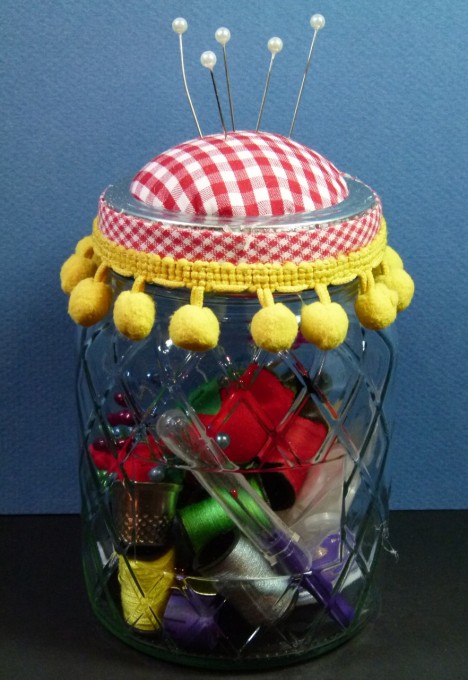
Canning Jar Sewing Kit

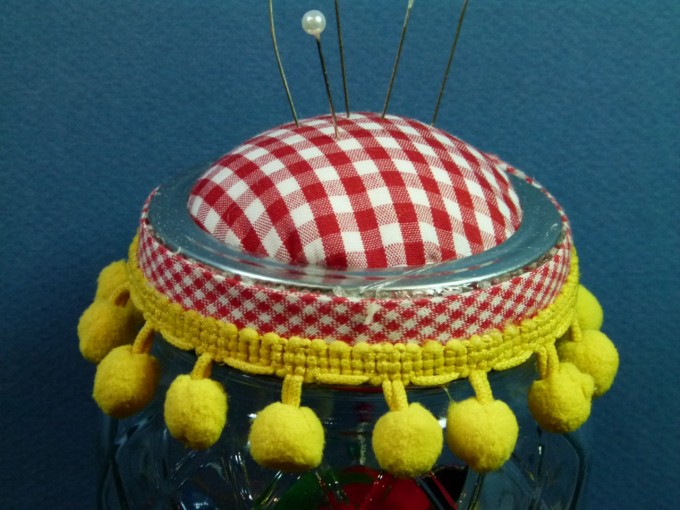
How cute are these little things. Sewing kits you make from canning jars! What a great idea as a little gift for someone going away to college, to live in their first apartment, or maybe for some freshly divorced guy who will have to sew his own buttons on his shirts? You could assembly line a dozen of these before the holidays and have them handy as hostess and last-minute gifts.

Another thing I saw on Pinterest, it originally came from Martha Stewart. I decided to dress mine up even more with the checked bias tape around the edge of the jar lid and the fancy dangly pom-pom’s. I found everything I needed to make them; fabric, trims, and basic sewing kit, all at Wal-Mart.

Pig Linoleum Print

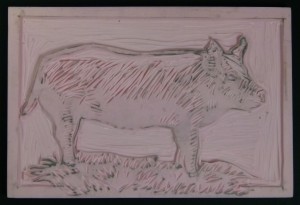
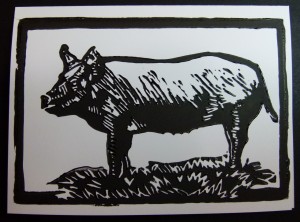
I did another linoleum cutting for a card to be added to my “farm” series of prints.

I was feeling a little overwhelmed by life the other day. I had so many projects I wanted to do I didn’t know where to start. So I didn’t. Instead, I sat down and cut this guy out. I’d drawn him out a while ago. I find this work so relaxing and calming.

I love the way he came out.


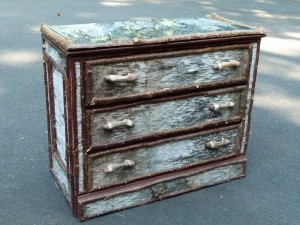
Adirondack Dresser

Disclaimer: No trees were killed or injured in the making of this dresser.

I’ve been cleaning out my garage. I mean really cleaning out the garage. We have a two car garage that we’ve never parked our cars in. Not in 15 years. First there were lots of strollers, then there were lots of tricycles, not there’s lots of bikes, sporting equipment, cans of chicken and goat food, and 15 years of accumulated junk. If it doesn’t serve a real anduseful, regular purpose, it’s being donated, thrown out, or given away.

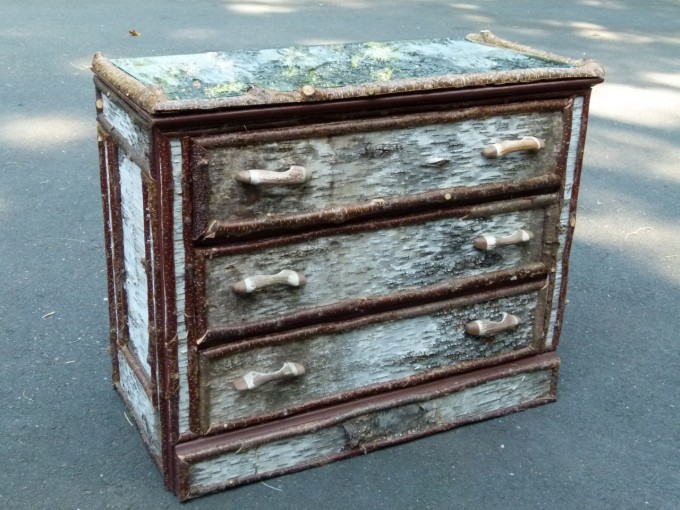
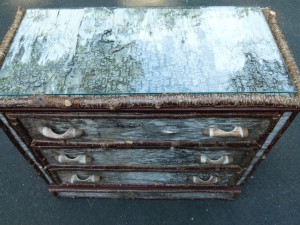
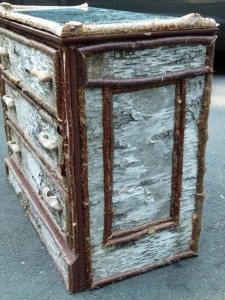
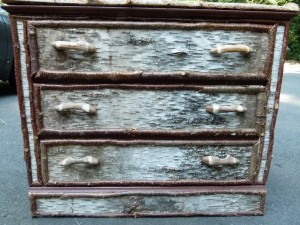
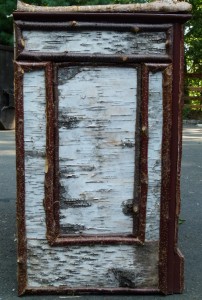
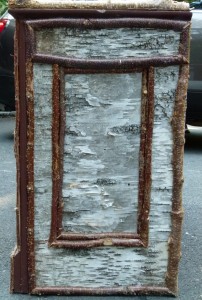
Because of this cleaning I have finally reached, way at the back of the garage, this dresser that I recovered to make it look like an Adirondack-style dresser.


I don’t know how I got the idea to try this quite a few years ago, but one summer when we were up at my husband’s family camp house in Maine I picked out an old dresser that was in the house. It was really ugly and didn’t work very well. The drawers were sticky and it was painted this awful salmon color. I stuck that in the car to bring back home. Then I went out for a walk in the woods. There are lots of woods there, and in those woods there are lots and lots of fallen birch trees. I took a sharp, strong knife with me, and when I found a good tree that had some pretty bark on it in good condition, I would cut a seam down the bark and literally peel it off the trunk. This is quite easy to do on a birch tree, but even easier to do if it was in some state of decay. You don’t want just the top layer, either. You want to get down a little so you’ve got a few layers of bark, but not so thick that it’s not pliable.
I had glass cut to fit the top of the dresser.


While you’re out there in the woods, bring a small saw along with you and cut lengths of straight felled saplings, or straight branches off larger fallen trees. Cut all of the smaller branches and leaves off of these branches and with a table saw, cut them in half horizontally. These are the branches you will “trim” the dresser with.


Once I had enough bark peeled to cover the top, sides and front of the dresser I took it all home, stacked in as neat a pile as I could, and laid some heavy boxes on top so the bark would dry nice and flat. I left it like that for quite a while — probably a month or so, before I started.


When you’re ready to start, take your now flat and dry pieces of bark and give each piece a careful but thorough shaking to get rid of any dirt. If you have a soft dust brush you may want to clean with that too. Start with your larger sections, like the top and sides, and figure out the pattern that you are going to use for the trim. I didn’t really have a plan or drawing for this, but just did it as I went along and then followed the first design on the rest of the dresser.You’ll need a miter saw for this or a hand saw with a miter box. I nailed the branches on with small trip nails.


Rarely did I have pieces of bark big enough for the space I needed, but I found I could easily piece together, overlapping the seams slightly, and you really didn’t notice it.
I also went around and painted the parts of the dresser than were still showing, like up around the top edge as it meets the drawer base, and around the base of the dresser. I used a dark brown wood and it really blends in with the bark and branches and is hardly noticeable.


I removed the original wood knob drawer pulls and found some deer antler pulls on the internet. I think they look perfect with it.


This was a great project that wasn’t difficult, yet the satisfaction level is high because I think it looks so great. It was a lot cheaper to make than the ones I’ve seen at craft shows. Using salvaged materials the only expense I had was for nails, drawer pulls and the glass for the top. My husband will gladly chime in on how long this project took me to finish. It’s not that it was complicated, but it was out in the garage and was really being done for fun and not out of necessity. Out of sight out of mind. I am glad that I finally finished it, and that I’ve finally dug it out from the back of the garage. Now I’ve just got to get it back up to Maine!
One day I’d like to try this with a desk on a much more refined scale.