Peanut Butter Sandwich Cookies

The Litchfield County area of Connecticut is beautiful, and I happen to have spent a lot of time there this winter and spring for 2 reasons; 1) it’s where I ride. Although it’s always a full-day event for me as it’s about an hour an 10 minutes drive to get there, it’s worth it for the amazing trainer I have. She won the title of National Reigning Horse Association’s Rookie Professional World Championship in 2008 at the age of 42 only two years after she started training for it, or even riding western for that matter (she was an English hunter jumper prior to the switch), and 2) it’s where my never-ending hunt for the perfect farm has taken me to, so I am constantly searching the latest real estate listing in the area.

But I digress.

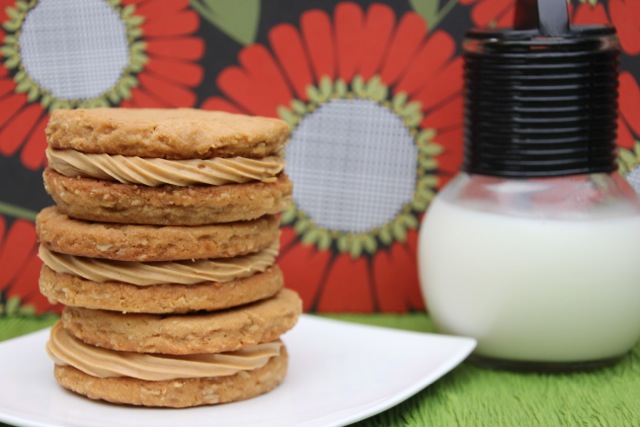
There is a terrific bakery in the small town of Kent called the Millstone Cafe and Bakery. They always have the most delicious peanut butter sandwich cookies, and inevitably I end up in there for a cup of coffee and one of those cookies for the ride home. I’m not normally a huge fan of peanut butter cookies, but the addition of the peanut buttery/buttercreamy filling really made the difference for me. I decided I needed to try and replicate them.

I came across a few recipes in my internet searching, but the one on We are Not Martha that was adapted from Tom Collicchio’s ‘Wichcraft cookbook. Being a huge Tom and Top Chef fan, I decided this one looked pretty good to me. I did make a few changes from their recipe in the icing. I wanted more of a peanut buttercream icing so I reduced the amount of peanut butter and increased the amount of butter. Also, when a recipe doesn’t specify light or dark brown sugar but just calls for “brown sugar”, I’ll think about it a bit – whether the recipe can stand up to the stronger taste of dark brown or needs the more delicate light brown – and usually end up using about 1/2 of each combined together and call it a day, which is what I did for this recipe.

No let me say right now that I made a double recipe of these cookies and cut them with a 3″ cutter. At that size they truly made a meal. When I make them again I will probably use something closer to a 1-1/2″ cutter so you can actually eat one in a sitting and not have to stage it throughout the day. I am embarrassed to say that I ate more than my fair share of this batch. Also, the toasted oats are the KEY to this cookie and you do not want to miss this step. It’s one of those cooking “aha moments” when you wonder why you’ve never seen a recipe that calls for it or thought of it yourself because it tastes so amazing and adds so much more flavor to the cookie.

I also forgot to photograph most of the steps in this process, which goes to show how much I really was taking a blogging vacation. None of the steps are hard, but if you want good photos click the link to the blog I adapted the recipe from – she’s got some good photos.

Peanut Butter Sandwich Cookies

Recipe adapted from We are Not Martha who adapted it from Tom Colicchio’s ‘witchcraft book.

(makes 12 or more, depending on the size you make – see note above)

  • 1/2 C (1 stick) plus 4 T butter, room temperature
  • 1 cup old-fashioned oats
  • 1 cup all-purpose flour
  • 1 teaspoon baking soda
  • 1 teaspoon salt
  • 1/3 cup granulated sugar
  • 1/2 cup packed brown sugar
  • 1/2 cup peanut butter
  • 1 recipe for peanut butter filling (below)

(Pre-heat oven to 350 degrees)

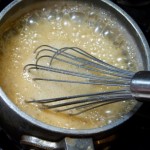
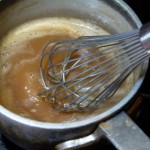
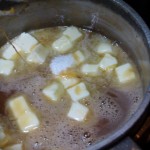
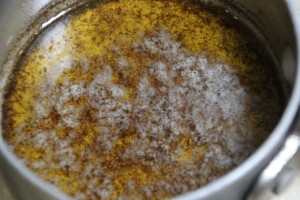
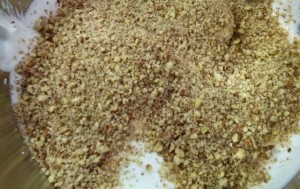
In a small saucepan over medium heat, melt the 4 T of butter. When it’s melted, pour in the oats and stir for about 5-7 minutes, until browned and toasted. Lay a piece of parchment paper on a cookie sheet and when the oats are done toasting, pour them on the parchment paper.

In a medium bowl, whisk together the flour, baking soda, and salt. Set aside.

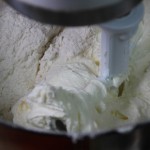
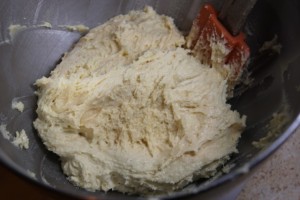
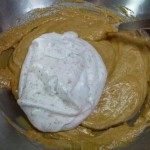
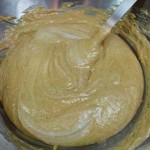
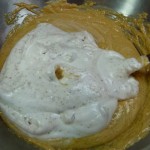
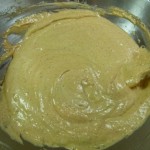
In the bowl of a mixer, combine 1 stick butter, brown sugar, and granulated sugar with the paddle attachment. Add peanut butter and continue mixing until well-combined. And delicious looking. Now, add the flour mixture and mix until just combined. Add in the oats, too, and combine. But don’t mix too much or the oats will break.

Place the dough on a piece of parchment paper and put another piece of parchment paper over the top. Roll the dough out with a rolling pin, until it’s about 1/4 inch thick and even. Slide the dough onto the back of a cookie sheet and stick in the fridge for about 20-30 minutes.

When the dough is done chilling, place it on the counter and take the top sheet of parchment paper off. Using a 2-inch round (or smaller; see note above)  cookie cutter (or biscuit cutter), cut an even number of  cookies out of your dough. Line two baking sheets with parchment paper and place cookies about 1 inch apart on sheets. You can re-roll the scraps once, refrigerate the dough again, and cut out some more cookies with the scrap dough as well.

Bake the cookies for about 10 minutes, rotating sheets halfway through, at 350 degrees. Transfer the cookies to wire racks so they can cool completely. Note that these cookies are very delicate when they are hot so handle them with care. They do get a little easier to handle once they cool off.

Peanut Butter Filling:

  • 4 tablespoons unsalted butter, room temperature
  • 1/2 cup peanut butter
  • 1/2 cup confectioners’ sugar
  • 1/2 teaspoon salt
  • Fill a pastry bag (or ziplock bag with the corner tip cut) with the peanut butter filling. Flip every other cookie over and fill the cookies with the bottom facing up. Put the other cookie on top and admire the beautiful sandwich you have created.
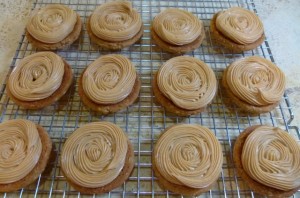

    Pipe the icing onto the cookies that you have placed top down on the rack.
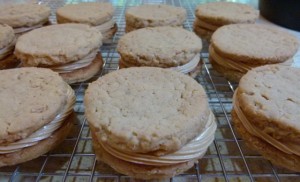
    Top with the remaining cookies, face up. to complete the sandwich.

    I found that because of the butter in the icing that these cookies were best kept in an airtight container in the refrigerator, but take them out of the fridge 5 or 10 minutes before serving.

    Print This Recipe Print This Recipe Pin It
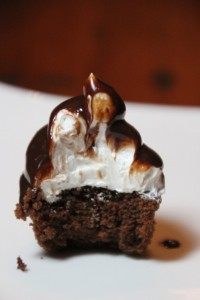
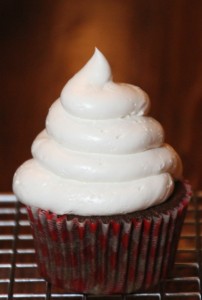
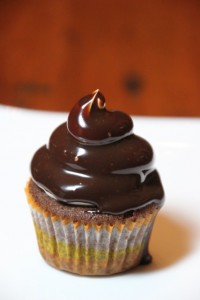
    Devil’s Food Cupcakes with Coconut Buttercream & Chocolate Ganache

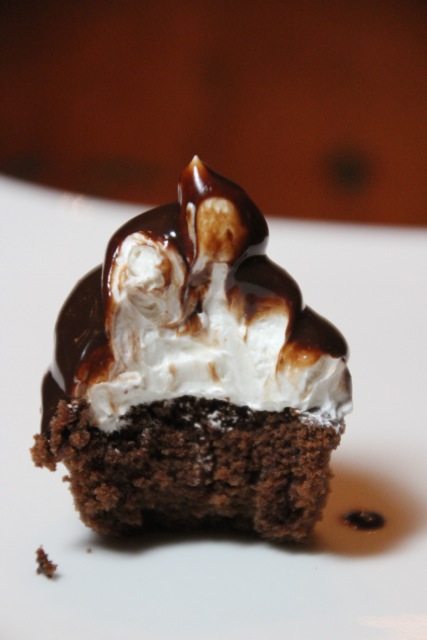
    My friend Susan told me about some cupcakes she’d had recently. Chocolate cake with coconut frosting and a chocolate glaze. She knows me well enough to know that I would try and re-create them on my own. Unfortunately I didn’t have time to bring some over to her before I left for Texas to see if I’d done the originals justice.

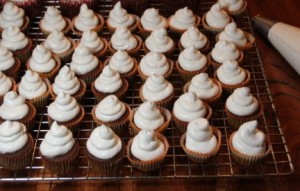
    I’m not going to give a lot of details on the recipes as they are pretty straightforward. I chose this devil’s food cake recipe because I’ve used it many times and it consistently delivers a moist, tender, chocolaty tasting cake. You will find details on making the coconut buttercream icing in this previous post. My coconut cake is one of my favorite cakes, but this combination of the devil’s food cake with the coconut buttercream and the chocolate ganache icing really was delicious.

    Devil's Food Cupcakes with Coconut Buttercream and Chocolate Ganache

    Devil’s Food Cake

    Serves 12.

    Originally published July 1, 1994 in Cook’s Illustrated. Adjusted slightly by Crafty Farm Girl, April, 2012.

    While developing our devil’s food layer cake recipe we found very little difference between cakes baked with standard American cocoa and “Dutched” cocoa. We chose water over milk or buttermilk to moisten our cake batter, discovering that cakes made with dairy had a more muted chocolate flavor.

    This cake’s texture is both soft and dense, similar to chocolate pound cake, only softer and lighter. Its flavor is intensely chocolate, yet pleasantly sweet. The substantial coffee-flavored buttercream stands up to the cake’s dense texture and balances the rich chocolate flavor.

    Ingredients

    * 1/2 cup natural cocoa powder
    * 2 teaspoons instant espresso powder , or instant coffee
    * 1 cup boiling water
    * 2 teaspoons vanilla extract
    * 12 tablespoons unsalted butter (1 1/2 sticks), softened
    * 1-1/4 cups granulated sugar
    * 2 large eggs, at room temperature
    * 1-1/4 cups unbleached all-purpose flour
    * 1/2 teaspoon baking soda
    * 1/2 teaspoon table salt

    Instructions

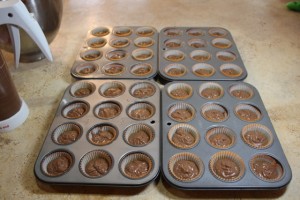
    For the cupcakes: Adjust oven rack to lower middle and upper middle positions and heat oven to 350 degrees. Line 4 mini cupcake pans with paper liners.

    Mix cocoa and instant coffee in small bowl; add boiling water and mix until smooth. Cool to room temperature, then stir in vanilla.

    Beat butter in bowl of electric mixer set at medium-high speed until smooth and shiny, about 30 seconds. Gradually sprinkle in sugar; beat until mixture is fluffy and almost white, 3 to 5 minutes. Add eggs one at a time, beating 1 full minute after each addition.

    Whisk flour, baking soda and salt in medium bowl. With mixer on lowest speed, add about 1/3 of dry ingredients to batter, followed immediately by about 1/3 of cocoa mixture; mix until ingredients are almost incorporated into batter. Repeat process twice more. When batter appears blended, stop mixer and scrape bowl sides with rubber spatula. Return mixer to low speed; beat until batter looks satiny, about 15 seconds longer.

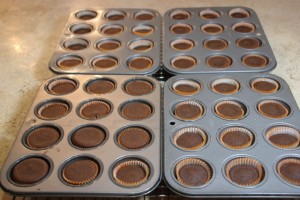
    Divide batter evenly between cupcake liners, filling about 3/4 full. Bake until they feel firm in center when lightly pressed and a skewer comes out clean or with just a crumb or two adhering, 6-8 minutes. Tranfer pans to wire racks; cool for 20 minutes. Remove cupcakes from pans and place on wire rack.


    Coconut Buttercream Icing

    • 4 large egg whites
    • 1 cup granulated sugar
    • pinch table salt
    • 1 pound unsalted butter (4 sticks), each stick cut into 6 pieces, softened, but still cool
    • 1/4 cup cream of coconut
    • 1 teaspoon coconut extract
    • 1 teaspoon vanilla extract

    Combine whites, sugar, and salt in bowl of standing mixer; set bowl over saucepan containing 1 1/2-inches of barely simmering water. Whisk constantly until mixture is opaque and warm to the touch and registers about 120 degrees on an instant-read thermometer, about 2 minutes.

    Transfer bowl to mixer and beat whites on high speed with whisk attachment until barely warm (about 80 degrees) and whites are glossy and sticky, about 7 minutes. Reduce speed to medium-high and beat in butter 1 piece at a time. Beat in cream of coconut and coconut and vanilla extracts. Stop mixer and scrape bottom and sides of bowl. Continue to beat at medium-high speed until well-combined, about 1 minute.


    Chocolate Ganache

    Original recipe from Martha Stewart Living.

    YieldMakes 3/4 cup ganache

    Ingredients

    • 1/2 cup heavy cream
    • 3-1/2 ounces dark chocolate, finely chopped (preferably 70 percent cacao)
    • 1/2-ounce (1 tablespoon) unsalted butter, softened
    Directions
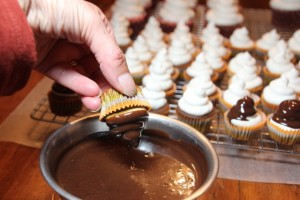
    Bring cream to a boil in a saucepan over medium-high heat. Pour cream over chocolate in a heatproof bowl. Let stand for 2 minutes. Add butter, then whisk mixture until smooth. Let cool a bit, stirring often, as if it is too warm it will melt the buttercream icing, but don’t let it get too cool or it will be too thick.

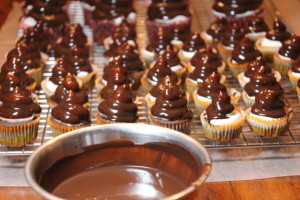
    Holding cupcakes by their liners, carefully dip icing into ganache and gently shake extra off. Replace cupcake on wire rack and let cool.


    Devil's Food Cupcakes with Coconut Buttercream and Chocolate Ganache


    Print This Recipe Print This Recipe Pin It
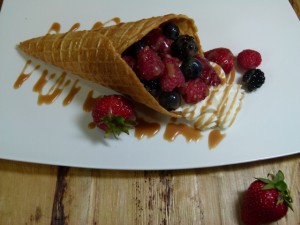
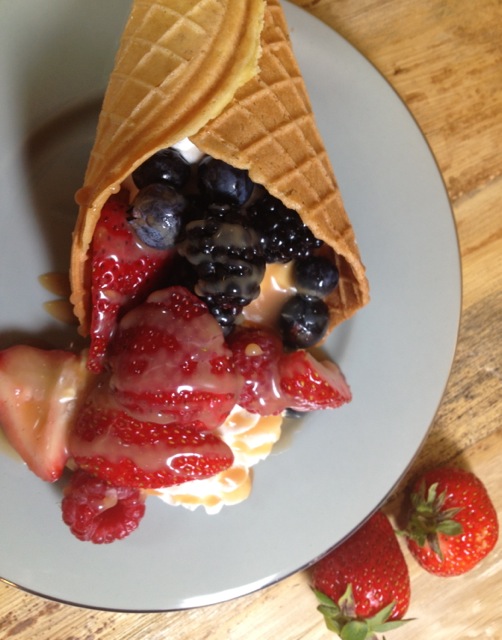
    Homemade Waffle Cones with Whipped Cream, Berries & Salted Caramel Sauce

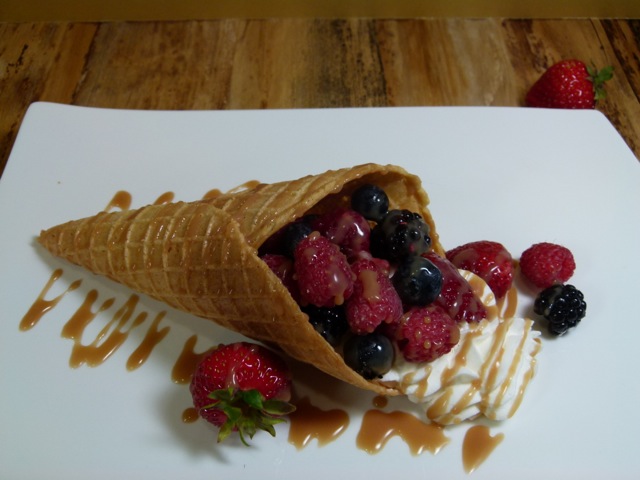
    For some strange and unknown reason an issue of New York Weddings showed up in our mailbox the other day addressed to Amanda. Like most girls of 22, she’s already busy planning her perfect dream wedding on Pinterest, even though she’s not even engaged. And I happily pin things to my own Pinterest board entitled “Amanda’s Dream Barn Wedding”. I thought I’d send the magazine down to her at school, but was thumbing through it at dinner last night and they had some lovely food ideas in there. One of them was a waffle cone with whipped cream and berries and a salted caramel sauce. Wow. Did that look delicious.

    I Googled the recipe and came up blank, but I did get a recipe for salted caramel sauce. Then I surfed around some more and discovered what seemed to be a good waffle cone maker that was currently on the market, and the rest I didn’t need a recipe for.

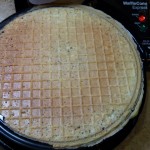
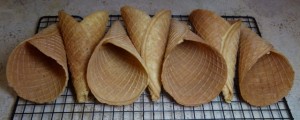
    Now I realize not everyone is as stupid as impulsive as I am to will run right down to their nearest Kohl’s to buy a waffle cone maker, but I can always justify these things in my head with 4 kids and a bit of a farm stand/market here at my house. I’ll find a way for the thing to pay for itself. I got the Chef’s Choice Waffle Cone Maker and it worked like a dream. I used the recipe they had right in their instruction book, using the recipe they said made a lighter and more delicate cone.

    This recipe I’m sure would be just as tasty with store-bought waffle cones.

    Salted caramel coulis

    Recipe from Epicurious, reprinted from Bon Appetit, May 2008

    • 1/2 cup sugar
    • 1/4 cup water
    • 1/2 cup heavy whipping cream
    • 3 1/2 tablespoons unsalted butter
    • 1/2 teaspoon fleur de sel or coarse kosher salt

    Combine sugar and 1/4 cup water in heavy medium saucepan. Stir over medium-low heat until sugar dissolves. Increase heat and boil without stirring until syrup is deep amber color, occasionally brushing down sides with wet pastry brush and swirling pan, about 10 minutes. Add heavy whipping cream (mixture will bubble vigorously). Stir over low heat until any caramel bits dissolve.


    Remove from heat. Stir in unsalted butter and fleur de sel or coarse salt. Transfer caramel to small pitcher or bowl. Cool. DO AHEAD: Can be made 1 day ahead. Cover and chill. Stir over low heat just until warm enough to pour before using.

    Elegant Wafer Cones

    Recipe from Chef’s Choice

    This batter makes a delicate wafer cone. Cake flour ensures the best results. If you use all-purpose flour, you may need to add a small amount of additional oil to the recipe.

    Yield: About 8 cones (I got 7)

    • 2 whole eggs
    • 1/4 tsp. salt
    • 2/3 cup granulated sugar
    • 2 tbsp.vegetable oil
    • 1 cup cake flour
    • 1 tsp. vanilla extract

    Preheat the WaffleCone Express™. Start with Color Control setting of 2 1/2 to 3, but change as necessary for best results.

    Beat the eggs and salt in a small bowl with a fork until well blended. Beat in the sugar and beat until sugar is incorporated and the eggs have lightened in color slightly, about 1 minute. Stir in the oil. Add the cake flour and stir slowly until all flour is moistened. Beat another 15 seconds to incorporate the flour and remove all lumps. Stir in the vanilla extract.

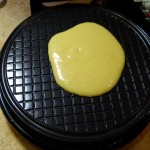
    Spoon 2 tablespoons (1 ounce) of batter in the center of the iron. Bake for 1 minute then check for proper color. Cook and additional 5 to 10 seconds if necessary.


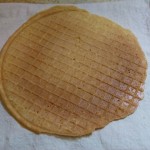
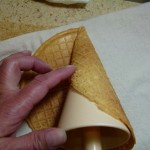
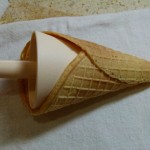
    Quickly remove the waffle from the WaffleCone Express™ onto a clean cloth towel. If the waffle is too hot to handle with your bare hands, use the cloth to help lift and roll the waffle around the cone form. Hold the cone a few seconds to set its shape then place on a wire rack to cool.


    To finish the Waffles

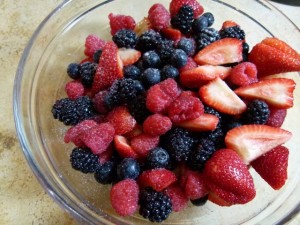
    • Mixed fresh berries (I used blueberries, blackberries, raspberries and strawberries)
    • 2 tablespoons sugar
    • 2 cups whipping cream
    • 1/4 cup confectioners sugar
    • 1 teaspoon vanilla extract

    Wash the berries and dry on paper towels. Core and slice strawberries. Add all berries to a bowl and sprinkle with sugar. Toss gently to coat and refrigerate until ready to assemble.


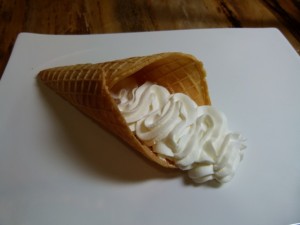
    When you are ready to assemble the cones, whip the cream to fairly stiff peaks, adding confectioner’s sugar to taste, and vanilla extract. (I put my whipped cream in a pastry bag with a big star tip, but you can just spoon it into the cone if you’d prefer.)

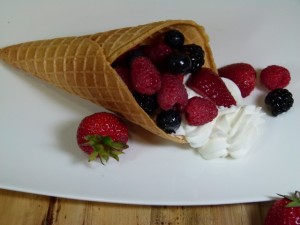
    Pipe or spoon whipped cream along the bottom of the cone, "spilling" a bit out onto the plate.


    Spoon fresh berries into cone.


    Drizzle cone, fruit and whipped cream with the salted caramel sauce.


    This is an impressive looking dessert that was nice and light, and although it looks complicated, it really wasn’t hard to make – especially if you skip the homemade waffle cones!


    Print This Recipe Print This Recipe Pin It
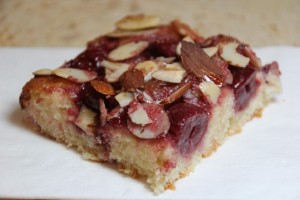
    Cherry-Almond Focaccia

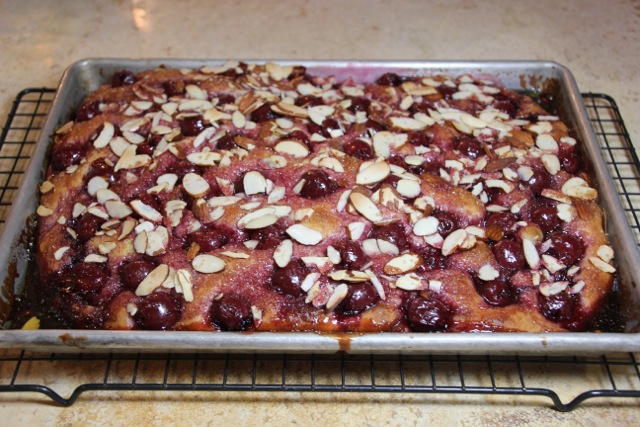
    This recipe was on the cover of Bon Appetit this month, and I thought it looked delicious. A sweet dough with tart cherries, almonds, raw sugar and a syrup made from the cherry juice on top. Yummm. I made the dough on Friday night and finished the recipe on Saturday morning. Everyone thought it was delicious, from kids to adults. I’m thinking of making another batch to bring to Easter dinner at my dads.

    Cherry-Almond Focaccia

    Recipe from the April, 2012 issue of Bon Appetit magazine. 

    Serves 16

    Ingredients
    Master Sweet Dough
    3 tablespoons extra-virgin olive oil, divided
    2 cups drained pitted tart cherries in light syrup (such as Morello) plus 1 cup syrup (from a 24–28-ounce jar)*
    3 tablespoons granulated sugar
    3/4 cup sliced almonds (with or without skins)
    1/3 cup raw sugar

    *Tart cherries in light syrup can be found at some supermarkets and at Middle Eastern markets and sahadis.com.

    Preparation
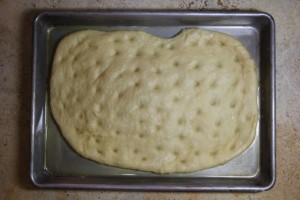
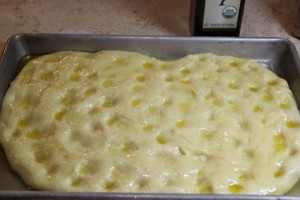
    Punch down dough. Coat a large rimmed baking sheet (about 16×12 inches) with 1 Tbsp. oil. Press dough evenly into pan, leaving a 1 1/2-inch border. Loosely cover with plastic wrap or a kitchen towel; let rise in a warm, draft-free area until puffed but not doubled in size, 45–50 minutes.


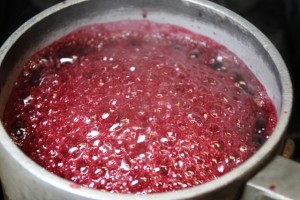
    Meanwhile, bring cherry syrup and granulated sugar to a boil in a small saucepan, stirring to dissolve sugar. Reduce heat to medium; simmer, stirring occasionally, until mixture is reduced to 1/3 cup, 8–10 minutes. Transfer to a small bowl; let cool completely.


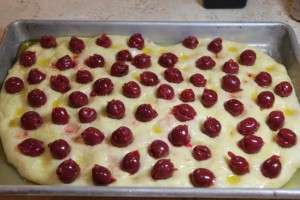
    Arrange a rack in middle of oven and preheat to 400°. Using your fingertips, press dimples all over dough surface. Drizzle dough with remaining 2 Tbsp. oil. Scatter cherries over, pressing them gently into dough.


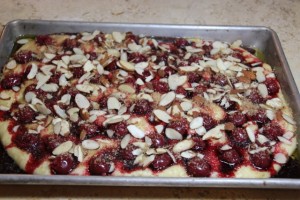
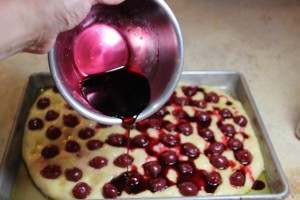
    Drizzle reduced syrup over, allowing it to pool into nooks and crannies. Sprinkle almonds over, then raw sugar. Let rise until dough is doubled in size, 15–20 minutes.


    Bake until focaccia is golden brown, 20–23 minutes. Let cool in pan on a wire rack for at least 15 minutes. Serve warm or at room temperature.


    Master Sweet Dough

    Makes 1 pound, 10 ounces dough

    Recipe from the April, 2012 Bon Appetit

    Ingredients

    • 2/3 cup whole milk
    • 5 tablespoons sugar, divided
    • 1 3/4 teaspoons active dry yeast (from one 1/4-ounce envelope)
    • 2 large eggs, room temperature
    • 2 3/4 cups unbleached all-purpose flour
    • 1 teaspoon kosher salt
    • 1/2 cup (1 stick) unsalted butter, cut into 1-inch pieces, room temperature, plus 1/2 tablespoon, melted

    Preparation

    Heat milk in a small saucepan over medium heat or in a microwave until an instant-read thermometer registers 110°–115°. Transfer milk to a 2-cup measuring cup; stir in 1 Tbsp. sugar. Sprinkle yeast over milk and whisk to blend. Let sit until yeast is foamy, about 5 minutes. Add eggs; whisk until smooth.

    Combine remaining 4 Tbsp. sugar, flour, and salt in the bowl of a stand mixer fitted with a dough hook. (If making Vanilla Cloverleaf Sweet Rolls, scrape in seeds from vanilla bean. If making Apricot-Anise Tarts, add aniseed.) Add milk mixture. With mixer running, add 1/2 cup room-temperature butter, 1 piece at a time, blending well between additions. Mix on medium speed for 1 minute. Knead on medium-high speed until dough is soft and silky, about 5 minutes.

    Brush a medium bowl with some melted butter; place dough in bowl. Brush top of dough with remaining melted butter; cover with plastic wrap. Do Ahead: Can be made 1 day ahead. Cover with plastic; chill.

    Let dough rise in a warm, draft-free area until doubled in size, 1–1 1/2 hours (or 2–2 1/2 hours if dough has been refrigerated).

    Print This Recipe Print This Recipe Pin It

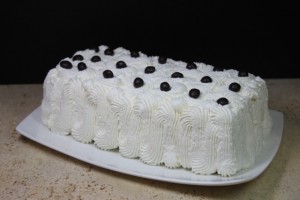
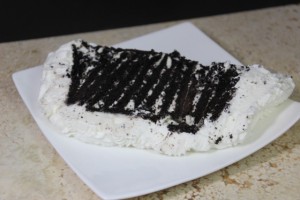
    Famous Icebox Cake

    This cake is what most people know as Famous Chocolate Wafer Cake, made by sandwiching Nabisco Famous Chocolate Wafer cookies in whipped cream and letting it sit for a few hours. I had never had this cake until my father married my stepmother, Donna. After that, it became the featured birthday cake at every household celebration. I don’t know how somebody couldn’t like this cake. It’s not too heavy, it’s chocolate and whipped cream together, it’s easy to make, and it’s delicious. I made one this week just to show my family how much I loved them.

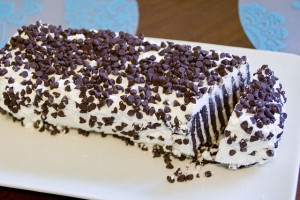
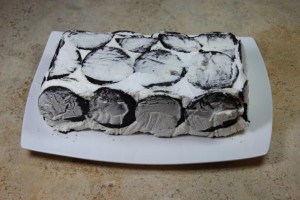
    While my stepmom always makes this cake free-form by stacking them vertically in rows, I decided to make mine inside a large loaf pan that was 10″ x 5″, but you can use any size you have on hand. You also don’t have to make it into a loaf shape, but can stack them into any pan you have. If you surf the internet you’ll see all kinds of variations of this cake, so you can get as creative as you’d like.

    Famous Icebox Cake

    2 boxes Nabisco Famous Chocolate Wafer cookies (you’ll have extra)
    4 cups whipping cream (you may need more, depending on the size of the cake you make)
    1/4 cup confectioner’s sugar (or to taste)
    1-1/2 teaspoons vanilla extract

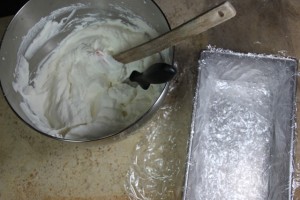
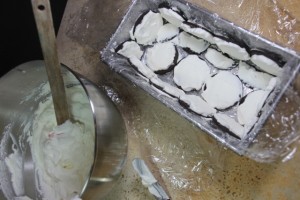
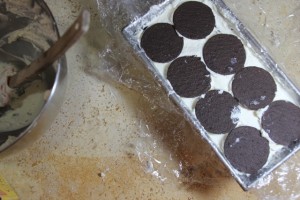
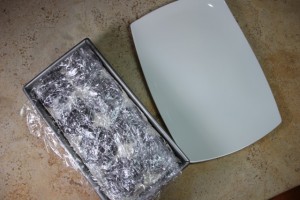
    Whip the cream with sugar and vanilla to firm peaks. Line pan with plastic wrap, overlapping edges so that the plastic wrap hangs out over the sides of the pan on all sides. Line bottom and sides of pan with whipped cream covered cookies, icing both sides.


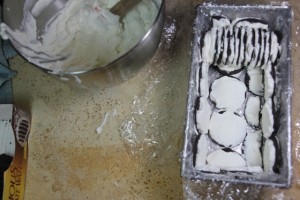
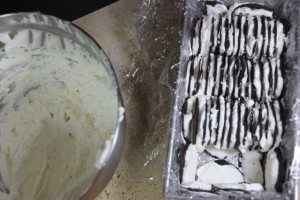
    Start stacking cookies with whipped cream on one side, vertically, with the whipped cream side facing the same direction on each cookie. Continue stacking cookies and whipped cream until you fill the pan.


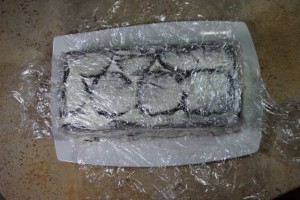
    I filled in the spaces between the stacks with additional whipped cream and then put a final layer of cookies on the top (bottom) of the came. Ice this with a thin layer of whipped cream, lay the edges of the plastic wrap over the cake and refrigerate for 3-4 hours.


    I used a pastry bag fitted with a large star tip because it’s a fast and easy way to make the cake look extra special You certainly don’t have to use a pastry bag and can simply put a final layer of whipped cream around the outside of the cake using a large offset spatula like my stepmom always does.


    Because of the fresh whipped cream, this cake is best within the first day of making that, after that it may get a little weepy and soggy, but it will still taste good!

    Print This Recipe Print This Recipe

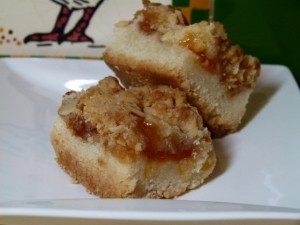
    Apricot-Almond Shortbread Bars

    I hosted a party this past Monday night for the camp that my children all attend, so while I was working at breakneck speed making a table and cleaning my disastrous house, I also had to cook. It’s more of a finger food event, and some guests had volunteered to bring some things, so I made my Warm Black Bean & Chipotle Dip and then three different types of dessert bars; these Apricot-Almond Shortbread Bars are my absolute favorites. The almond paste in the topping gives it the most amazing flavor when combined with the apricots. I changed the recipe a bit from the original. I increased the quantities as I wanted to make a 13 x 9 x 2 pan, and I added some chopped dried apricots that I soaked in boiling water for 10 minutes. Also, the original recipe just called for 3 tablespoons of Grand Marnier in the filling, but I use a combination of Grand Marnier, Amaretto and almond extract.

    Apricot-Almond Shortbread Bars

    Makes 32 bars

    Original recipe from Bon Appetit, December, 2005.  Altered by Crafty Farm Girl, February, 2012.

    Ingredients

    • 1/2 cup chopped dried apricots
    • 1-1/2 cups apricot preserves
    • 2 tablespoons orange liqueur (such as Grand Marnier)
    • 1 tablespoon Amaretto liqueur
    • 1/2 teaspoon almond extract
    • 1-1/2  cups (3 sticks) unsalted butter, room temperature
    • 1 cup sugar
    • 1 teaspoon almond extract
    • 3 cups all purpose flour
    • 1/4 teaspoon salt
    • 7 oz. almond paste, crumbled
    • 1/2 cup sliced almonds, divided
    • Preparation

      Preheat oven to 325°F. Butter a 13 x 9 x 2-inch metal baking pan; line bottom and sides of pan with parchment paper, extending over sides. Butter parchment. Bring 1 cup water to boil in a small saucepan and stir in the chopped dried apricots. Turn off heat and let apricots sit for about 10 minutes. Drain. Mix dried apricots, preserves and orange liqueur in small bowl; set aside.


      Using electric mixer, beat butter and sugar in large bowl until well blended. Beat in almond extract. Add flour and salt; beat just until blended. Transfer 1 cup of dough to another small bowl; add crumbled almond paste and mix with fingertips until small clumps form. Mix in 1/4 cup sliced almonds; set aside for topping.


      Press remaining dough evenly onto bottom of prepared pan. Spread preserves mixture evenly over. Using fingertips, coarsely crumble topping over preserves, then sprinkle 1/4 cup almonds over. Press topping lightly into preserves.


      Bake shortbread until top and crust edges are golden brown, about 1 hour. Cool completely in pan on rack. Using parchment paper as aid, lift shortbread from pan. Cut shortbread into 4 equal strips, then cut each strip crosswise into 8 small bar cookies.


      DO AHEAD Can be prepared ahead. Store in single layer in airtight container at room temperature up to 4 days or freeze up to 2 weeks.

      Print This Recipe Print This Recipe

    Pin It
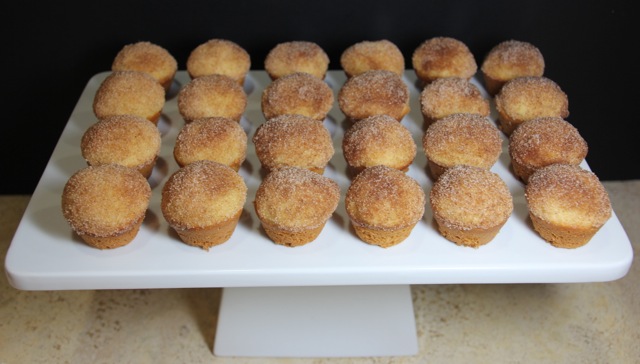
    Cinnamon Brown Butter Breakfast Puffs


    This is a recipes I got off Smitten Kitchen a few weeks ago. I made it one weekend morning for the kids, and they were so excited.

    Cinnamon Brown Butter Breakfast Puffs

    Recipe from Smitten Kitchen, who adapted from Betty Crocker and others

    If you don’t wish to use buttermilk, you can replace it with regular milk and nix the baking soda (keeping the baking powder). I like to get the toppings ready first because they take so little time to bake, you don’t want to be scrambling to have something to dip them in.

    Yield: 9 to 12 standard muffin-size puffs or 30-ish miniature ones. Try not to overfill as I did or you won’t get big domes on them.

    Coating
    2/3 cup granulated sugar
    1 tablespoon ground cinnamon
    6 tablespoons unsalted butter

    Puffs
    1 1/2 cups all-purpose flour
    1 1/2 teaspoons baking powder
    1/2 teaspoon baking soda
    1/2 teaspoon table salt
    1/4 teaspoon freshly grated nutmeg
    1/2 cup granulated sugar
    1/3 cup (5 tablespoons plus 1 teaspoon) unsalted butter, at room temperature, plus extra for greasing muffin cups
    1 large egg
    1 teaspoon pure vanilla extract
    1/2 cup buttermilk

    Preheat oven to 350°F. Butter 12 standard size or 30 miniature muffin cups, or line cups with paper liners.

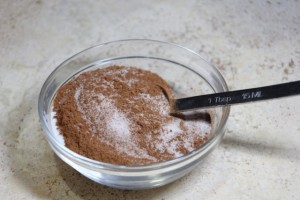
    Prepare coatings: In a small saucepan, melt 6 tablespoons butter over medium heat and continue to cook it, stirring frequently, until brown bits form on the bottom and it smells nutty and heavenly. Immediately remove from heat and set aside. In a small bowl, combine 2/3 cup sugar and cinnamon. Set aside as well.


    Prepare puffs: Whisk flour, baking powder, baking soda, salt and nutmeg together in a medium bowl and set aside. In the large bowl of an electric mixer, beat softened butter and sugar together until light and fluffy. Add egg and vanilla and beat until combined. Mix in 1/3 of flour mixture, followed by 1/2 of buttermilk, repeating again and finishing with the flour mixture. Mix only until combined.


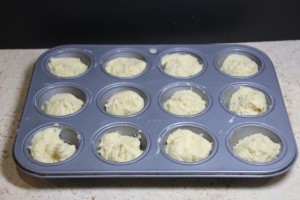
    Spoon into prepared muffin cups, filling only 3/4 of the way. (If you overfill them they won’t dome up properly.) Bake standard sized muffins for 20 to 25 minutes and miniature muffins for 12 to 14 minutes. When finished, muffins will feel springy to the touch and a tester inserted into the center will come out clean. Transfer them in their pan to a wire rack.


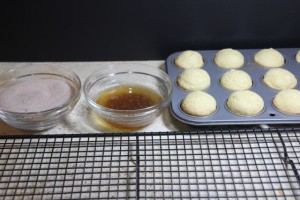
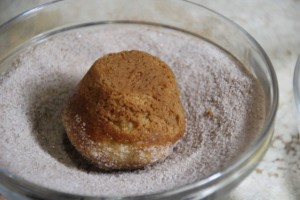
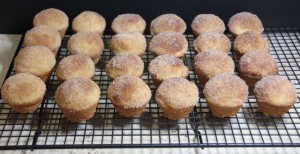
    As soon as you feel you’re able to pick one up, take your first puff and roll the top and upper edges in the browned butter. Don’t be afraid to pick up the browned butter solids at the bottom of the saucepan; they’re the dreamiest part. Let any excess butter drip off for a second before gently rolling the butter-soaked cake top in cinnamon-sugar. I find if you roll too firmly, or have too much wet/not absorbed butter on top, the sugar can clump off, which is heartbreaking. Transfer puff to wire rack to set and repeat with remaining puffs. Eat warm.


    For an even more indulgent, doughnut-like puff: Make an extra two tablespoons of the browned butter and roll the whole puff in it and the cinnamon sugar. (I usually have enough cinnamon sugar to fully roll the puffs.)

    Do ahead: Puffs are best within hours after they are baked. They can be made it advance and stored in a freezer bag until needed, too. Simply spread them out on a baking tray and reheat them until warm in the oven.

    Pin It

    Banana Cream Pie


    I saw the book Sarabeths Bakery—My Hands to Yours at a bookstore recently and had to have it. It’s a large, beautiful cookbook with lots of classic looking pastries and desserts. I’ve already worked my way through the Croissant Dough and made Pains au Chocolat and Almond Croissants with it that were divine, but when I saw this recipe for Banana Cream Pie I made it that same day.

    I have never made a banana cream pie before. What I liked about this recipe was that she added unflavored gelatin and whipped cream to the custard so it wasn’t quite so heavy. I added a pinch or two of cornstarch and cream of tartar to the whipped cream topping so it wouldn’t get weepy. Now her recipe uses a almond pastry crust, and I will put the recipe for that at the  bottom of this post. In the interest of saving time, I used a ready-made crust (I love the one from Trader Joe’s). Next time I will definitely use the almond pastry dough to compare the two.

    Banana Cream Pie

    Recipe from Sarabeth’s Bakery; From My Hands to Yours by Sarabeth Levine. Altered slightly by Crafty Farm Girl, January, 2012

    Makes 8-10 servings

    Almond Pastry Dough (recipe below) or ready-made pie crust dough

    Cream Filling
    1 teaspoons unflavored gelatin powder
    2 tablespoons cold water
    4 large egg yolks
    1/3 cup superfine sugar
    1 ½ tablespoons cornstarch
    1 ½ cups whole milk
    Seeds from ½ vanilla bean or ½ teaspoon pure vanilla extract
    3 ripe bananas, cut lengthwise in half, then into 1/3-inch slices
    ¼ cup heavy cream

    Topping
    1-1/2 cups heavy cream, chilled
    3 tablespoons superfine sugar
    Seeds from ½ vanilla bean or ½ teaspoon vanilla extract
    2 tablespoons sliced almonds, toasted for garnish

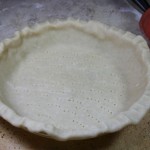
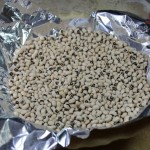
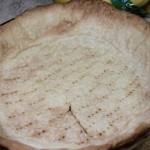
    Position a rack in the bottom third of the oven and preheat to 375 o F. Line a 9-inch pie pan with the dough. Pierce the bottom of the dough in a uniform pattern with a fork. Freeze for 15 minutes. Line the dough with some parchment paper or aluminum foil and fill with pastry weights or dried beans. Bake on a half-sheet pan for 15 minutes, until the pastry is set. Remove the parchment paper and the weights and continue baking until the pastry is golden brown, about 10 minutes more. Cool completely.

    To make the filling, sprinkle the gelatin over the water in a small bowl. Set aside until the gelatin softens, about 5 minutes. Whisk the yolks, sugar, and cornstarch in a heatproof medium bowl until combined; set aside. Place a heatproof bowl with a medium-mesh wire sieve near the stove.


    Heat the milk in a heavy-bottomed medium saucepan over medium heat until very hot. I added my scraped vanilla bean and the pod to the milk as I was heating it up. If you are using vanilla extract, wait to add it until directed. Gradually whisk the milk into the egg yolk mixture. Pour the mixture back into the saucepan. Whisking constantly, being sure to reach into the corners of the saucepan, cook over medium heat until the filling thickens and comes to a full boil. Reduce the heat to low and whisk for 1 minute.

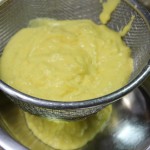
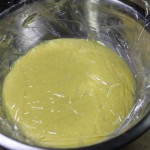
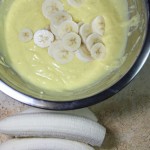
    Remove from the heat, add the gelatin mixture, and whisk until the gelatin is completely melted (the pastry cream will thin slightly—don’t worry). Strain through the medium-mesh wire sieve into the clean medium bowl. Stir in the vanilla extract if using. Place a piece of plastic wrap directly on the surface (this discourages a skin from forming), and pierce a few holes in the plastic wrap with the tip of a sharp knife. Let stand on a wire rack until completely cooled and thickened but not set. Remove the plastic wrap and fold in the bananas. (I forgot to cut my bananas in half lengthwise before cutting, but I will do it next time for sure.)


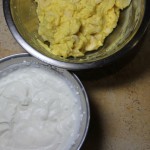
    Using a whisk or a handheld electric mixer, beat the cream in a small bowl just until it forms soft peaks. Fold the whipped cream into the banana mixture. Fill the cooled pastry shell and smooth the top. Cover the plastic wrap and let the filling set in the shell in the refrigerator, about 1 hour.


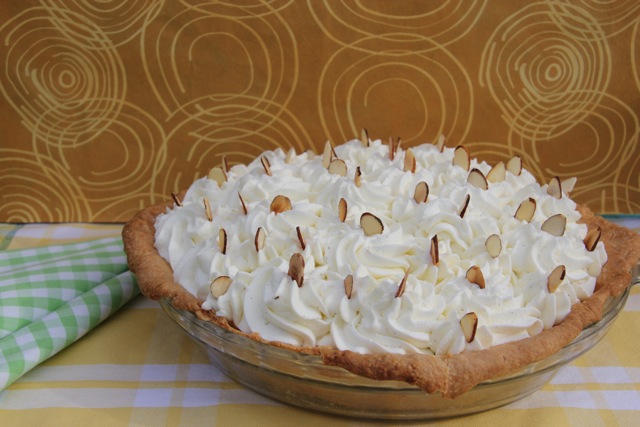
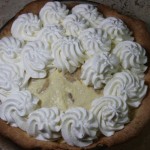
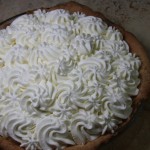
    To make the topping, beat the heavy cream, sugar, and vanilla just until it forms peaks. Transfer to a bag fitted with a 3/8-inch diameter open-star tip, such as Ateco #824. Pipe swirls of whipped cream to completely cover the top of the pie. Refrigerate until the pie is chilled, at least 1 hour. Just before serving, top with the toasted almonds. Serve chilled.


    Almond Pastry Dough

    Makes enough for one 9-inch pie

    This delicious, buttery crust bakes into a crisp, nut-flavored shell.

    3 tablespoons sliced natural almonds, toasted
    1 cup plus 1 tablespoon unbleached all-purpose flour, divided
    3 tablespoons superfine sugar
    1/8 teaspoon fine sea salt
    8 tablespoons (1 stick) unsalted butter, cut into ½-inch cubes, chilled
    1 large egg yolk
    1 tablespoon ice water, plus more as needed
    Seeds of ½ vanilla bean
    ¼ teaspoon almond extract

    Grind the almonds in a coffee grinder with 1 tablespoon of the flour until powdery. Combine the remaining 1-cup flour, the ground almond mixture, sugar, and salt in a medium bowl. Add the butter cubes and toss to coat with the flour mixture. Using a pastry blender, cut in the cutter until the mixture looks like coarse meal with some pea-size pieces of butter, about 2 minutes. Using a fork, mix the egg yolk, 1-tablespoon ice water, vanilla seeds, and almond extract in a small bowl. Drizzle the yolk mixture all over the flour mixture and, using a wooden spoon, combine just until the dough clumps together. If the dough is too dry, add more iced water, a little at a time.

    Transfer the dough to a lightly floured work surface and shape into a 1-inch-thick disk. Wrap in plastic wrap. Refrigerate until chilled but not hard, 30 minutes to 1 hour. (The dough can be refrigerated up to 1 day, but it will be very hard, and should stand at room temperature for about 30 minutes before rolling out. The dough can also be frozen, double-wrapped in plastic wrap, for up to 2 weeks. Defrost in the refrigerator overnight.)

    Print This Recipe Print This Recipe Pin It
    French Crullers

    I am back from our two-week vacation in Wyoming. As you may have noticed, I took a break from blogging for the most part. It was a necessary break to recharge my creative batteries (and recover from a nasty cold).

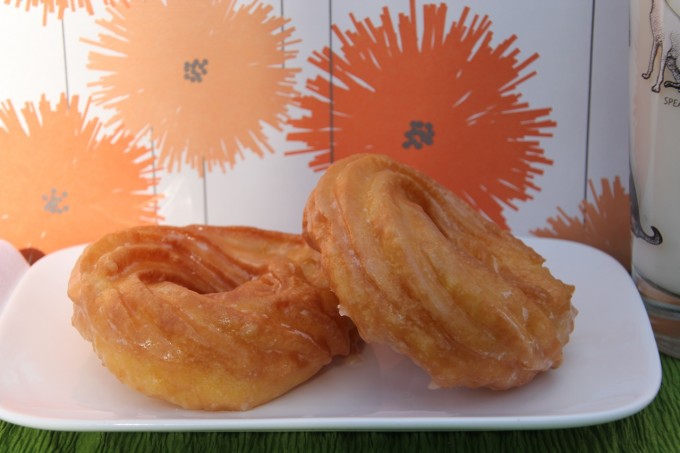
    While I brought out a donut cookbook I had, I never did get around to making any out there. Today though, with reality knocking (loudly) on my door and the kids moaning about school tomorrow, I decided some crullers would be the perfect treat for all of us. Now I’ve made crullers before, but I felt like I was just short of getting them ‘just right’ the first time. This time I incorporated all that I learned the first time with things I thought of after, and this time, they were about as close to perfect as I could imagine.

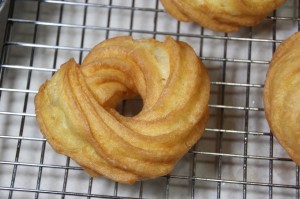
    I am not a big donut fan; I find them heavy and doughy, and usually not worth the calories consumed for the pleasure (or lack of) eating one. A good cruller though is light and airy and a perfect treat. So much more impressive-looking than your average donut, and because they are made from a simple Pâte à Choux Dough, they are actually much easier to make than a normal raised, yeasted donut.

    Recipe from the book Donuts by Elinor Klivans. Adapted slightly by Crafty Farm Girl, January, 2012.

    Pâte à Choux Dough

    Makes 8 crullers

    4 tablespoons (2 oz.) unsalted butter, cut into small pieces
    1/2 cup (4 fluid oz.) water
    1/2 teaspoon granulated sugar
    1/2 teaspoon salt
    1/2 cup all-purpose flour
    2 large eggs, at room temperature
    2/3 teaspoon vanilla extract
    Canola oil for brushing parchment and deep frying
    Vanilla-orange glaze (recipe follows)

    Place a wire rack on your work surface with parchment, waxed paper or newspaper underneath to catch dripping oil and glaze.

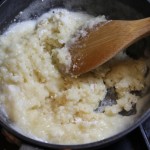
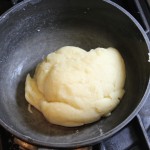
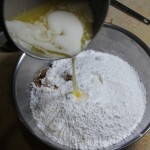
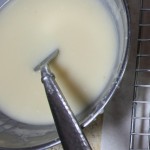
    In a saucepan over medium heat, combine water, the butter, sugar, and salt and bring to a boil. Stirring to melt the butter. Add the flour all at once and stir viforously with a wooden spoon until the flour is incorporated and the dough pulls away from the sides of the pan in a ball. Reduce the heat to low and cook, stirring constantly, for 1 minute. The dough will continue to pull away from the pan sides in a large clump.


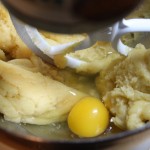
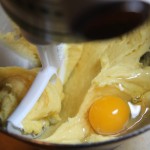
    Scrape the dough into a large bowl, Using an electric mixer set on medium speed (use the paddle attachment for a stand mixer), beat until the dough forms large clumps, about 1 minute. Add the eggs, one at a time, beatinguntil smoothly blended after each addition. Add the vannilla and beat until smooth.


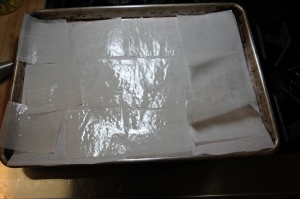
    Line a baking sheet with parchment paper. Pour about a teaspoon of oil onto the parchment and with a pastry brush, brush the oil all over the parchment. Use more oil if necessary. Cut the oiled parchment into 3 strips and each strip into 3 squares. Place another piece of parchment on the baking sheet and arrange the oiled parchment squares onto the baking sheet.


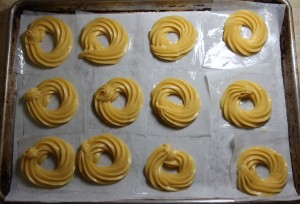
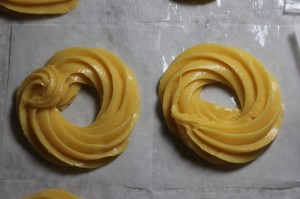
    Fit a pastry bag with a 1/2-inch star tip and full the bag with the dough. Pipe a 3-inch circle of dough onto each of the 8 squares of oiled paper.


    Pour oil to a depth of 2 inches into a deep-fryer or deep, heavy saute pan and heat over mediun-high heat until it reads 360 degrees F on a deep-frying thermometer. Place the piped crullers into the freezer while your oil is heating.

    Vanilla-Orange Glaze

    Makes about 3 cups glaze

    6 tablespoons unsalted butter, melted
    2-1/2 cups (10 oz.) confectioner’s sugar
    3/4 teaspoon vanilla extract
    1/4 teaspoon orange extract
    5 tablespoons hot water (plus more as needed)

    In a bowl, whisk together the melted butter, confectioners sugar, vanilla and orange extracts and water until smooth. Whisk in 1-2 teaspoons more hot water if needed to give the glaze a thin, light, consistency. Use right away.


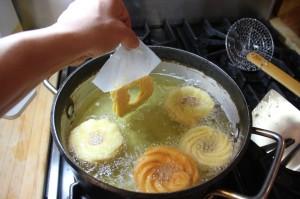
    When the oil has reached 360o F, remove the crullers from the freezer. Turn over one of the dough-topped paper pieces and slide the dough circle into the hot oil. You may need to use a thin spatula to get it started, but then it should gentle fall into the oil. Repeat to add 1 or 2 more dough circles to the oil. Be sure not to overcrowd the pan. The crullers should increase in size. Deep-fry until golden on the first side, about 2 minutes.


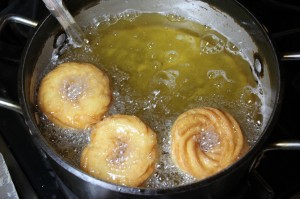
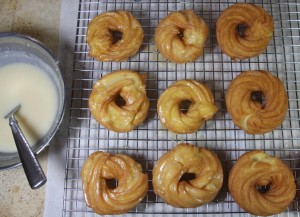
    Using tongs, a wire skimmer, or a slotted spoon, turn and fry until dark golden on the second side, about 1-1/2 minutes longer. I found that some of the crullers got cracks in them as they were frying, and a few extra brief turns in the oil sealed those up. Transfer to wire rack, fluted side up, to drain. Fry the remaining crullers.


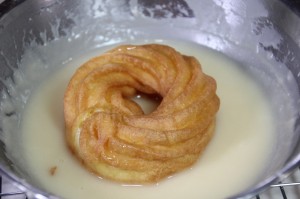
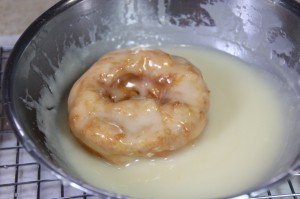
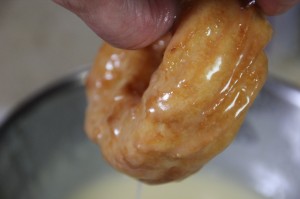
    I found that glazing the donuts while they were still pretty warm but not hot worked best. It allowed just the thinnest layer or glaze the remain on the donut, leaving it nice and light. Place the crullers, one at a time, into the glaze, and turn it with a fork to cover completely. Lift it out and allow as much glaze to drop off as you can. Replace on wire rack and allow to cool.


    Crullers are best eaten the day you made them.


    Print This Recipe Print This Recipe

    Pin It
    Pumpkin Cake Roll with Maple & Orange Buttercream

    I’m hosting Thanksgiving this year. As far as family, only my immediate family will be there, and Amanda is coming home from college for the long weekend. I can’t wait to see her! We will be having dinner for 14 people, and included will be my best friend, Cyrena, my ex-husband, my friends the Hiltons, and Lorraine Hilton’s sister. Everyone is bringing something, even Lorraine, who is in the middle of a kitchen renovation and only has a hot plate and a microwave to use!

    I am not a fan of pumpkin pie, but felt that some sort of pumpkin dessert should be on the menu. I make a mean pumpkin cheesecake, but just wasn’t in the mood. For some reason I felt like a pumpkin roll cake seemed like the right thing. I searched the internet and found several different recipes. Taking a bit from each one, I changed so much that I really can’t call this anything but an original recipe. However, to use correct blogging etiquette, these are the recipes I primarily referred to: Taste of Home Pumpkin Cake Roll, Wilton Pumpkin Roll Cake, and Cook’s Illustrated Classic Coffee Buttercream Icing.

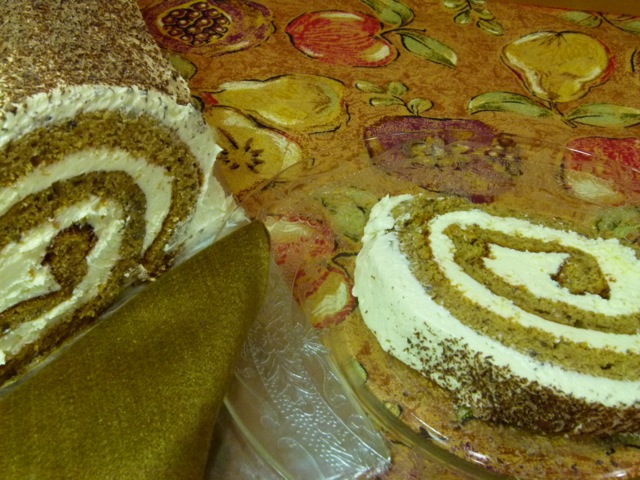
    What I like about this recipe, besides it being really delicious, is that you can make it as simple or as fancy as you want, or have time for. If you’re pressed for time, or don’t want to make it so fancy, you can just make one flavor buttercream and spatula ice the cake simply. If you have the time or interest, make both flavors of the buttercream, pipe a little icing along the bottom edge and put the grated chocolate and edible gold flakes on top.

    Note that you really need to roll the cake when it is still very warm. If you wait until it has already cooled you risk cracking the cake.

    Don’t be overwhelmed by all the photos. This is not a terribly hard recipe. Even if you don’t want to try the whole recipe, you can make the delicious cake and spread vanilla ice cream in the roll and ice it with Cool Whip. It will still be yummy.
    Pumpkin Cake Roll with Maple & Orange Buttercream

    Recipe by Crafty Farm Girl, November, 2011.

    Makes about 16 servings.
    Cake

    • ¼ cup confectioners’ sugar
    • ¾ cup all-purpose flour
    • ½ teaspoon baking powder
    • ½ teaspoon baking soda
    • ½ teaspoon ground cinnamon
    • ½ teaspoon ground cloves
    • ¼ teaspoon salt
    • 4 eggs, separated
    • 1 cup granulated sugar, divided
    • 2/3 cup canned pumpkin (not pumpkin pie filling)
    • 1 tablespoon lemon juice
    • ½ cup ground pecans

    Filling & Icing
    4 large eggs
    1 cup granulated sugar
    pinch table salt
    1 pound unsalted butter (4 sticks), softened, each stick cut into quarters
    4 oz. pure maple syrup
    1 tablespoon finely minced orange zest
    1 tablespoon Grand Marnier (or 1/2 teaspoon orange extract)
    1 tablespoon fresh orange juice
    ¼ teaspoon orange extract
    Grated bittersweet chocolate (optional for decoration)
    Edible gold (optional for decoration)

    Instructions:
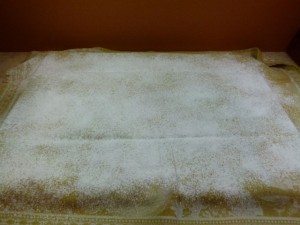
    For the cake, preheat oven to 375ºF. Grease an 11 x 17 in. jelly roll pan, line with parchment paper; grease and flour parchment paper. Set aside. Spread a clean kitchen towel on a wire cooling rack and sprinkle with confectioners’ sugar. Set aside.


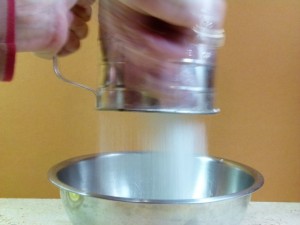
    In medium bowl, sift together flour, spices and salt.


    In large bowl, beat egg yolks until frothy with electric mixer.  Add ½-cup sugar; continue beating 3-5 minutes until thick and light in color. Add pumpkin and flour mixture; mix until well combined.


    In separate bowl, beat egg whites until frothy with electric mixer. Add lemon juice; continue beating 2 minutes. Gradually add remaining ½-cup sugar; continue beating until soft peaks form.Add pumpkin and flour mixture; mix until well combined.


    Sprinkle ground pecans over egg whites; gently fold in.


    Fold about 1 cup of egg white mixture gently into pumpkin mixture to lighten. Add another 2 cups egg white mixture and fold in again.


    Add remaining egg white mixture and fold again until no white streaks remain.


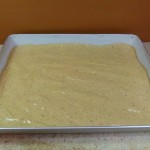
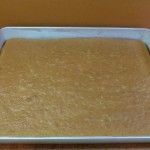
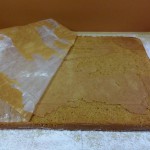
    Spread evenly into prepared pan. Bake 20-25 minutes (mine took exactly 20 minutes). Remove cake from oven. Gently loosen edges of cake from pan. Carefully turn cake onto prepared confectioner’s sugar-dusted dish towel. Cool cake 3-5 minutes. Carefully remove parchment paper.


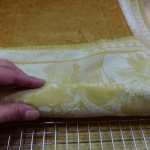
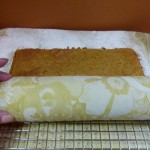
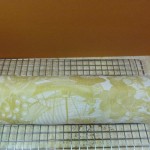
    Starting at a short edge, roll up cake with kitchen towel. Transfer rolled cake to cooling rack; cool completely.


    For icing combine eggs, sugar, and salt in bowl of standing mixer; place bowl over pan of simmering water. Whisking gently but constantly, heat mixture until thin and foamy and registers 160 degrees on instant-read thermometer. Beat egg mixture on medium-high speed with whisk attachment until light, airy, and cooled to room temperature, about 5 minutes. Divide mixture evenly between two bowls (use a kitchen scale if you have one.


    Place half of mixture back into mixing bowl and on medium speed, and 2 sticks of butter, one piece at a time. (After adding half the butter, buttercream may look curdled; it will smooth with additional butter.) Once all butter is added, slowly drizzle in maple syrup, increase speed to high and beat 1 minute until light, fluffy, and thoroughly combined. Remove maple icing and place remaining egg mixture back into mixing bowl.


    Follow instructions as above, but once you’ve incorporated all of the remaining 2 sticks of butter, drizzle in the extract, liquor and orange juice, and then mix in the orange zest. Increase speed to high and beat 1 minute until light, fluffy, and thoroughly combined. (Buttercream can be covered and refrigerated up to 5 days.)


    Cut a piece of cardboard about 2” longer and wider than cake roll. Cover with aluminum foil and tape securely.


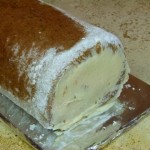
    On a clean work surface, unroll cake. Using an offset spatula, smooth the orange buttercream to edges of cake. You may have a little icing left over, depending on how thick you want the icing. Carefully re-roll the cake (without the towel this time!), being careful to get a tight roll, but no so tight that you squeeze out the icing. Using a large, sturdy spatula, move the cake roll onto the prepared foil-covered cardboard. If you have a little icing left over, smooth some onto the ends of the roll. Refrigerate for about 30 minutes to firm up the cake before you ice the outside.


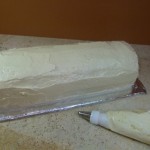
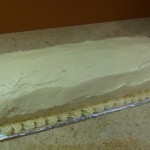
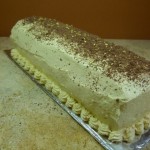
    Remove the cake from the fridge, and using the maple buttercream, spatula-ice the outside of the cake. If you want to get a little fancier you can put some of the remaining icing into a pastry bag with a star tip and pipe a decorative shell border around the base of the cake. If you want to take it another step, grate some bittersweet chocolate with a grater and sprinkle that over the top of the cake. For the last level of fancy, sprinkle the cake with edible gold flakes.


    Refrigerate the cake for about 30 minutes to firm up the buttercream, then you can cover it loosely with plastic wrap. Keep refrigerated until about 3 hours before serving, and then remove to room temperature until serving. Buttercream is always best when served at room temperature.