
The early morning sunrise reflecting off the seagulls feather's as he drops his morning clam hoping for a broken shell and a tasty breakfast.

The early morning sunrise reflecting off the seagulls feather's as he drops his morning clam hoping for a broken shell and a tasty breakfast.
This recipe was on the cover of Bon Appetit this month, and I thought it looked delicious. A sweet dough with tart cherries, almonds, raw sugar and a syrup made from the cherry juice on top. Yummm. I made the dough on Friday night and finished the recipe on Saturday morning. Everyone thought it was delicious, from kids to adults. I’m thinking of making another batch to bring to Easter dinner at my dads.

Recipe from the April, 2012 issue of Bon Appetit magazine.
Serves 16
Ingredients
Master Sweet Dough
3 tablespoons extra-virgin olive oil, divided
2 cups drained pitted tart cherries in light syrup (such as Morello) plus 1 cup syrup (from a 24–28-ounce jar)*
3 tablespoons granulated sugar
3/4 cup sliced almonds (with or without skins)
1/3 cup raw sugar
*Tart cherries in light syrup can be found at some supermarkets and at Middle Eastern markets and sahadis.com.
Preparation
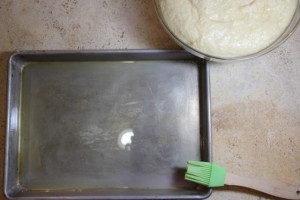
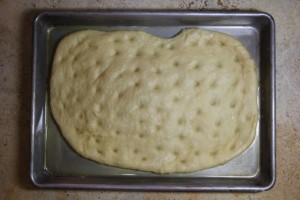
Punch down dough. Coat a large rimmed baking sheet (about 16×12 inches) with 1 Tbsp. oil. Press dough evenly into pan, leaving a 1 1/2-inch border. Loosely cover with plastic wrap or a kitchen towel; let rise in a warm, draft-free area until puffed but not doubled in size, 45–50 minutes.
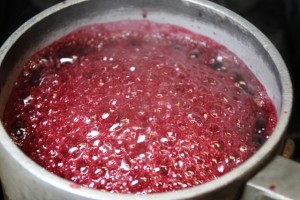
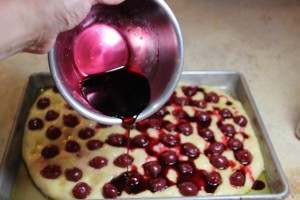
Meanwhile, bring cherry syrup and granulated sugar to a boil in a small saucepan, stirring to dissolve sugar. Reduce heat to medium; simmer, stirring occasionally, until mixture is reduced to 1/3 cup, 8–10 minutes. Transfer to a small bowl; let cool completely.
Arrange a rack in middle of oven and preheat to 400°. Using your fingertips, press dimples all over dough surface. Drizzle dough with remaining 2 Tbsp. oil. Scatter cherries over, pressing them gently into dough.
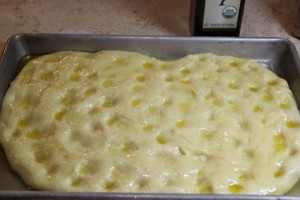
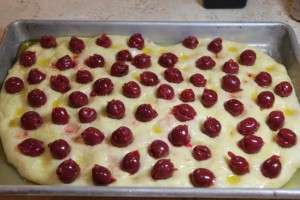
Drizzle reduced syrup over, allowing it to pool into nooks and crannies. Sprinkle almonds over, then raw sugar. Let rise until dough is doubled in size, 15–20 minutes.
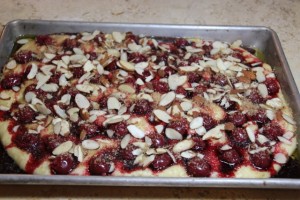
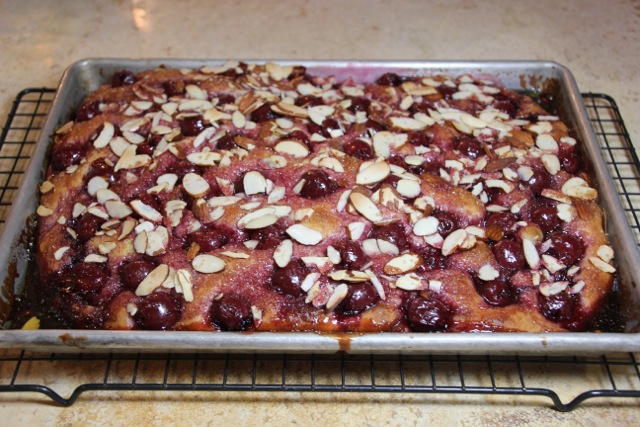
Bake until focaccia is golden brown, 20–23 minutes. Let cool in pan on a wire rack for at least 15 minutes. Serve warm or at room temperature.
Makes 1 pound, 10 ounces dough
Recipe from the April, 2012 Bon Appetit
Heat milk in a small saucepan over medium heat or in a microwave until an instant-read thermometer registers 110°–115°. Transfer milk to a 2-cup measuring cup; stir in 1 Tbsp. sugar. Sprinkle yeast over milk and whisk to blend. Let sit until yeast is foamy, about 5 minutes. Add eggs; whisk until smooth.
Combine remaining 4 Tbsp. sugar, flour, and salt in the bowl of a stand mixer fitted with a dough hook. (If making Vanilla Cloverleaf Sweet Rolls, scrape in seeds from vanilla bean. If making Apricot-Anise Tarts, add aniseed.) Add milk mixture. With mixer running, add 1/2 cup room-temperature butter, 1 piece at a time, blending well between additions. Mix on medium speed for 1 minute. Knead on medium-high speed until dough is soft and silky, about 5 minutes.
Brush a medium bowl with some melted butter; place dough in bowl. Brush top of dough with remaining melted butter; cover with plastic wrap. Do Ahead: Can be made 1 day ahead. Cover with plastic; chill.
Let dough rise in a warm, draft-free area until doubled in size, 1–1 1/2 hours (or 2–2 1/2 hours if dough has been refrigerated).
 Print This Recipe
Pin It
I'm a country girl at heart, but today I had to drive my girls down to the Red Hook area of Brooklyn by myself to find a new fiddle for India. We went to this terrific store that was recommended to us called Jalopy's and found the perfect larger full-size replacement to the beloved half size fiddle she's always used. We took a short walk around after and had lunch and walked around the piers where we had a delightful view of the Statue of Liberty. There were several abandoned, rusty, and somewhat scary old subway cars down there as well.
Batik: ba·tim [buh-teek, bat-ik]
noun
1. a technique of hand-dyeing fabrics by using wax as a dye repellent to cover parts of a design, dyeing the uncovered fabric with a color or colors, and dissolving the wax in boiling water.

When Amanda was little I got really into doing batik for a while. Somewhere packed away I still my favorite things I made back then, which were a T-shirt for me with a giraffe on it and a matching outfit for Amanda with leggings and a long ruffle-bottom T-shirt with a similar giraffe.
When we were in Mexico we stopped into the studio of one batik artist that was doing the most extraordinary batik pieces with many different colors. Doing multi-color batik is much more complicated than a single color process, but it inspired me to dig my batik stuff out of the basement and give it another try. It’s also something I realized I could do an ‘art class’ for my kids on, as they’ve been bugging me about doing another one lately.
When I searched online there were lots of inspiring things, but with Mexico still on my mind I found the work of Robin Zimmerman inspiring and wanted to see how close I could come to replicating this frog she had made, having never tried multi-colored batik before.
I started with a pre-washed, 100% cotton T-shirt and drew the design in pencil.

It was really nice to still have all of my batik supplies, including fabric dyes and wax, from the old days to use. A good source for batik supplies when Amanda was little, and I see now on an internet search that is still is, is Dharma Trading Co.
I cut out some cardboard to fit inside the shirt and pinned the t-shirt to the cardboard. Then, with a batik tool called a tjanting I filled in the ‘sky’ of the drawing that I wanted to remain white. I’ll admit to a little cheating here in that I drew in the black frame around the picture and outlined the frog with a black fabric marker. Hey, I’ve never tried this before and I just couldn’t figure out any other way to do it.
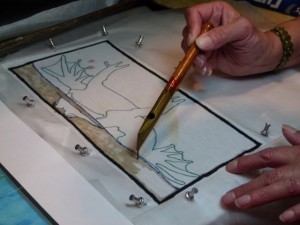
Then I outlined the frog with wax. This will allow me to fill in areas with dye without it running into other areas – or at least that’s the hope if I do it right.
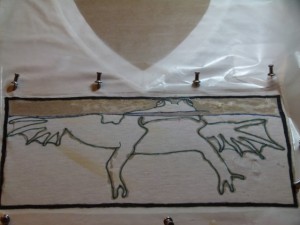
Then I colored in the frog; Some yellow on his throat and down his legs..
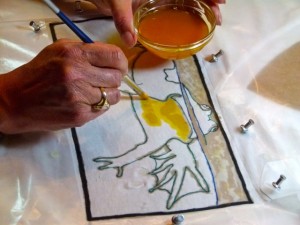
Blue fabric dye for the water.
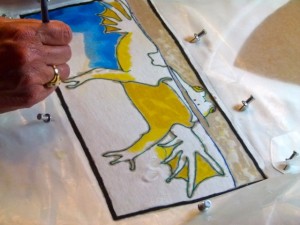
And then I filled in the rest of the frog with a green.
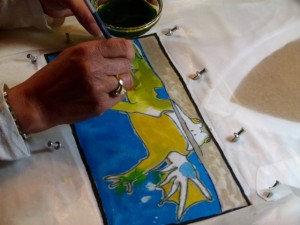
The first step in coloring is complete. In the morning the fabric was dry and the colors had lightened up just a bit. He’s not perfect and there were some areas where the wax wasn’t a connected line so the dye bled through, but all in all I was pleased so far.
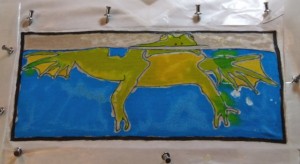
I waxed over the blue water so that color would remain blue.
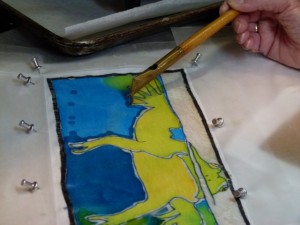
Then I went in and waxed over the frog in a random pattern, leaving un-waxed areas.
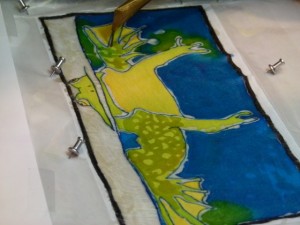
I cracked the wax up by bending it. I did this as I wanted some of the darker colored inks I was about to apply, particularly in the water area, to bleed through a bit.
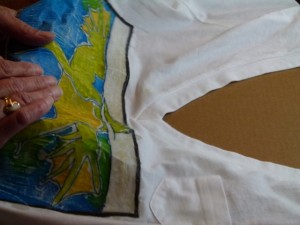
I painted in an olive green dye in the areas I’d left free of wax on the frog. This will (hopefully) give him the darker green spots that frogs have.
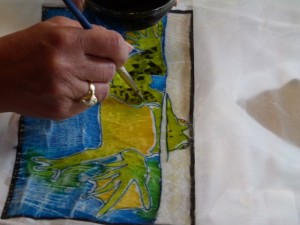
And then I painted a dark blue over the water color in the areas I’d cracked the wax in hopes that some of it bleeds through to give the water a little more dimension and color.
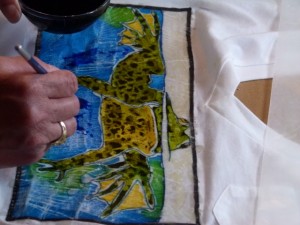
When the dye was completely dry and waxed over the entire area with a brush.
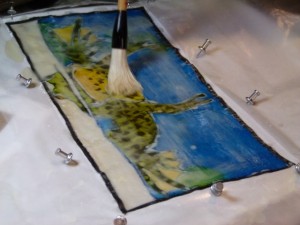
I wanted to dye the rest of the shirt a citron color green. I prepared the large batch of dye in my kitchen sink. To all of the dyes I used I added sodium carbonate, or soda ash fixer, which makes the dye permanent and keeps it from bleeding in the wash.
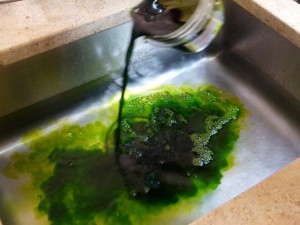
Into the dye bath it goes. Fingers crossed.
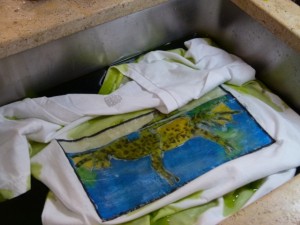
I let it sit in the dye for about 20 minutes. Let the dye drain out, and then wrung it out and hung it to dry outside.
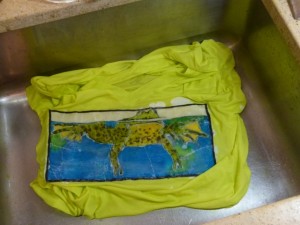
There are several methods to remove wax. I used the clean newsprint and iron method this time and found it quite effective. I’d saved some paper from Home Goods that they use to wrap up your purchases. This was free and it worked great. As a backup I also had a roll of wrapping paper for moving that I’d bought at Home Depot in the area where they sold moving boxes and other assorted packing materials. You put several layers of paper under the waxed areas, and then on top you use 2 or 3 layers of paper, and change often. You’ll never get all of the wax out this way, but I was pretty impressed with how well this worked this time. Something’s improved over the last 18 years – the paper, the iron, or my patience. The best way to remove that last final bit of wax is to dry clean the item. You can try the boiling method, but I never found this foolproof in the past.
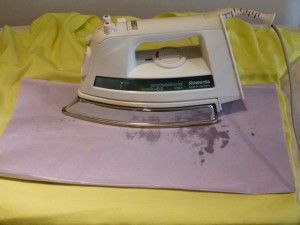
The final shirt. I still need to dry clean it to get that last bit of wax out.

Overall I’m really happy with how it came out. He’s not perfect. There are areas where dyes bled through, and you really can’t even see any parts where the darker blue dye bled through the cracks into the lighter blue. I’ll just say that it gives him character.

I did a few more of them this past week and I’ll share them with you as well, although perhaps not in such detail. I did want to give you the detailed steps in case anybody else wants to give it a try.

I'm hoping we're done with snow for the year - not that we got that much anyway. This is a photo I took one of the few times we did get some.
Remember those Preserved Lemons I made just before going away on vacation? Well, they’re ready now!
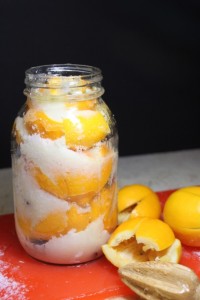
This is the recipe I made them specifically for, so last night I made it for Jim and my friend Cyrena. (I don’t eat shellfish, so I just got to enjoy the beauty of the dish.) The recipe came out of the book Cooking My Way Back Home by by Mitchell Rosenthal which is an inspiring new cookbook by the chef/owner of the San Francisco restaurants Town Hall, Anchor and Hope, and Salt House.

I love to cook for Cyrena because she makes a lot of what I call “yummy noises”. A true appreciator of food is always a joy to cook for, and she made a lot of yummy noises over this dish. I almost took a picture of her chasing the last grain of couscous around the plate and then licking the plate clean.
I’m not going to lie and say this isn’t a complicated recipe. It’s not something you’re going to throw together in 30 minutes, and not something you’re likely to make on a school/work weeknight (unless you’re an idiot, like me). That said, it is a lovely and impressive dish and one that should be made on a weekend or for your next dinner party. You could even serve it in miniature as an appetizer portion (maybe with one or two scallops and small portions of couscous and fennel salad).
I had every intention of making my own shrimp stock, but I couldn’t find shrimp with their head’s on, which is what the recipe called for. In the end I purchased frozen fish stock, which I figured was close enough, but use shrimp (home made or purchased) stock if you can. I also didn’t have any fresh dill for the couscous, so I used a few shakes of dried. Prepare all of your ingredients prior to cooking as things come together pretty quickly once you start cooking and you won’t have time to stop and chop vegetables in the middle of cooking.
Jim felt a little short-changed with just 3 scallops for his meal, so you might want to up your scallop count if you’re serving hungry men.
2 pounds dry-packed scallops
Canola oil, for sautéeing
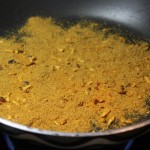
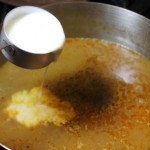
To make the sauce, in a small, dry frying pan, toast the curry powder over medium heat, stirring often, for about 1 minute, or until fragrant. Set aside. In a saucepan, heat the oil over medium heat. Add the carrot, celery, leek, ginger,and green onion and cook for about 5 minutes, or until the vegetables start to soften. Stir in the curry powder, turn down the heat to low, add the vinegar, and deglaze the pan, stirring to scrape up any browned bits from the pan bottom. Cook until the vinegar evaporates, then add the mirin and simmer for 2 minutes.
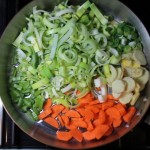

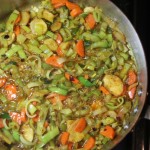
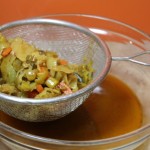
Add the vermouth and simmer for 2 minutes, then add the stock and simmer for 10 minutes, or until the mixture reduces slightly and the flavors are well blended. Add the cream, season with salt and pepper, and then cook for a few more minutes. Remove the sauce from the heat, strain through a fine-mesh strainer, and then return to the saucepan. Bring to a simmer over medium heat, and whisk in the butter, 1 tablespoon at a time, whisking after each addition until fully incorporated. When done, remove from the heat and keep warm.

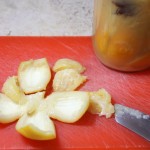
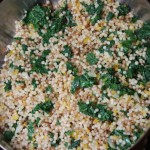
to prepare the couscous, cook the couscous according to the package directions, then toss with the olive oil and set aside. Rinse off the prepared lemons in cold water (I used about 1-1/2 to get 1/4 cup), and using a knife, scrape away and discard the pulp. I also scraped away the very top layer of the white inside as it seemed a little spongy and unappetizing. Dice the lemon finely. In a large sauté pan, heat the canola oil over low heat. Add the fennel and preserved lemon and cook, stirring, until the fennel is soft. Add the dill and cayenne pepper and stir well. Add the prepared couscous to the fennel mixture and stir to combine. Remove from heat.
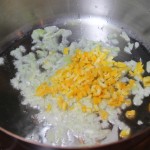
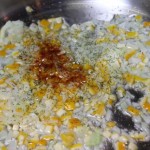
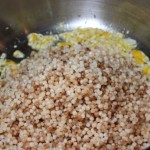
Season couscous with 1 teaspoon salt and the mustard greens. Mix well and season with salt and pepper. Cover and set the sauté pan aside for finishing up just before serving.
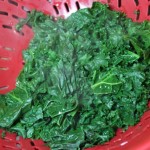
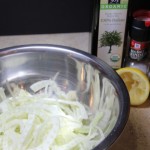
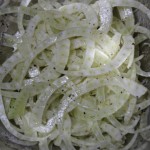
to prepare the salad, in a bowl, combine the fennel, oil, and lemon juice and toss to coat the fennel evenly. Season with salt and pepper and set aside.
to cook the scallops, heat a large sauté pan over high heat. When the pan is hot, add a thin layer of oil and heat until it shimmers. Add the scallops and cook, turning once, for 3 to 4 minutes on each side, or until nicely caramelized on the exterior and medium-rare at the center.
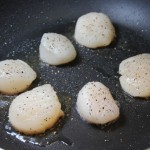

While the scallops are cooking, finish the couscous. Return the sauté pan to medium heat and re-heat the couscous over medium heat, stirring frequently. Cut the butter into 1/4-inch cubes. When the couscous is heated through, add the butter and stir gently until melted and evenly distributed.
To serve, divide the couscous among individual plates. Arrange some of the fennel salad and 3 scallops on top of each serving. Pour some sauce around the edge of the couscous on each plate, then drizzle some on top of each scallop.
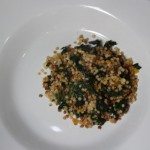
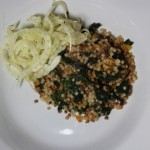


Serve immediately.

 Print This Recipe
Pin It
Print This Recipe
Pin ItI haven’t posted about the farm since before vacation mostly because there isn’t that much going on at the farm lately. Also because until yesterday my kids were still home on vacation and I always find having them home messes with my normal farm cadence. I love my family, but I have to admit that after 9 days of my entire family 24/7 rolling right into an additional 8 days of the 3 younger kids 24/7, I’ve frankly been teetering on the brink of sanity for the past few days. I am too much of a loner to spend that much time with anyone.

I’ve mentioned before that I normally sell my eggs through an email list I’ve put together. I call it “Free Range Friday at Crafty Farm Girls”, and I send the email out on Thursday nights, listing eggs and any other things I have available for sale. Early Friday mornings I put everything out at the lemonade stand I made a few years ago, and people come if they want anytime during the day.

I am now getting so many eggs that Free Range Friday’s just isn’t providing enough sales. The local gourmet cheese store has offered to sell them for me, but I’d really rather keep the sales in-house if I possibly can. I finally thought of a plan. I have this great rolling cooler that I’d bought at Home Goods last year that I often use to hold the eggs on Free Range Fridays. I took an old wooden box I had and cut a hole in the top for people to put the cash into, screwed on a latch with a padlock, and then screwed holed in it and bolted it on to the cooler. While I can’t be sure everyone will be honest and actually pay for their eggs, I can at least try to prevent them from taking the cash with them (unless they want to stick the whole damned rolling cooler into their car).

But in case you were worried about her, here’s Gracie, still smiling.

And since I don’t have much to say about the farm today, I’ll show you some other animal-related things.
I went riding this past Friday up in Kent, Connecticut. Although Kent is over an hour’s drive from where I live, I get up there as often as I can to train with Tammy Hoefer. She was the 2008 World Champion in the National Reining Horse Association’s Rookie Professional division. Finding a trainer in the western discipline in my neck of the woods is really difficult. I feel incredibly lucky to have found someone with such credentials and the drive is well worth it.

Evan and Maia came with me and Maia also took a lesson.

My saddle sat on the fence while Maia took her lesson.

Of course while we were up there we went real-estate hunting for the future farm. Litchfield County is one of the few areas of Connecticut where there are still some working farms. We saw lots of wild turkeys while driving around. Didn’t they know it’s chickens that are supposed to cross the road, not turkeys?

This handsome fellow was putting on a show for his ladies.

But then he realized his ladies weren’t paying the slightest bit of attention and instead were hi-tailing it out of there, so he started running to catch up to them.

There was some land for sale that had cows on it…do you think they come with the property?


I don't think a farm could look more picture perfect than this one did last week in the rolling hills between Kent and Washington, Connecticut. Even the twins were impressed by it's beauty, and it forced me to slam on my brakes and back up the hill a bit so I could take this photo.

This is the barn next-door to where I ride up in Kent, Connecticut. The red barn with the American flag and the budding leaves was pretty I thought.
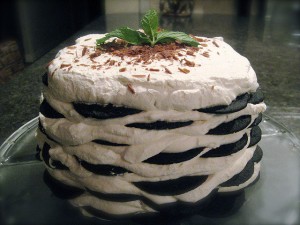
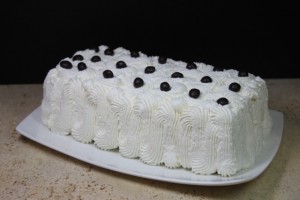
This cake is what most people know as Famous Chocolate Wafer Cake, made by sandwiching Nabisco Famous Chocolate Wafer cookies in whipped cream and letting it sit for a few hours. I had never had this cake until my father married my stepmother, Donna. After that, it became the featured birthday cake at every household celebration. I don’t know how somebody couldn’t like this cake. It’s not too heavy, it’s chocolate and whipped cream together, it’s easy to make, and it’s delicious. I made one this week just to show my family how much I loved them.
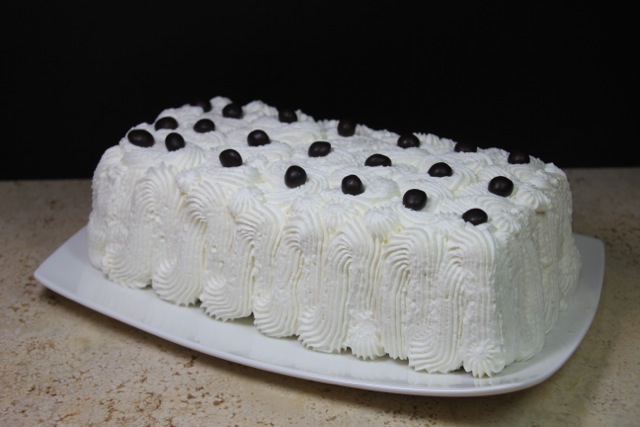
While my stepmom always makes this cake free-form by stacking them vertically in rows, I decided to make mine inside a large loaf pan that was 10″ x 5″, but you can use any size you have on hand. You also don’t have to make it into a loaf shape, but can stack them into any pan you have. If you surf the internet you’ll see all kinds of variations of this cake, so you can get as creative as you’d like.

2 boxes Nabisco Famous Chocolate Wafer cookies (you’ll have extra)
4 cups whipping cream (you may need more, depending on the size of the cake you make)
1/4 cup confectioner’s sugar (or to taste)
1-1/2 teaspoons vanilla extract
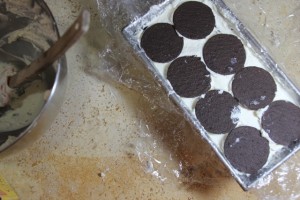
Whip the cream with sugar and vanilla to firm peaks. Line pan with plastic wrap, overlapping edges so that the plastic wrap hangs out over the sides of the pan on all sides. Line bottom and sides of pan with whipped cream covered cookies, icing both sides.
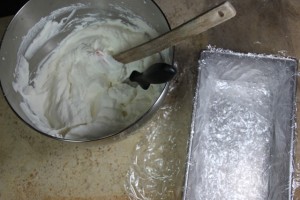
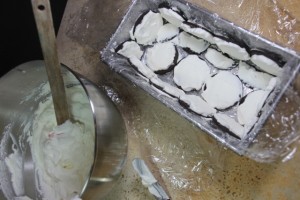
Start stacking cookies with whipped cream on one side, vertically, with the whipped cream side facing the same direction on each cookie. Continue stacking cookies and whipped cream until you fill the pan.
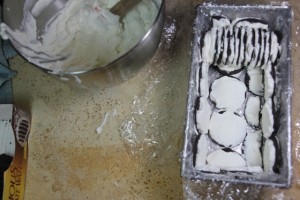
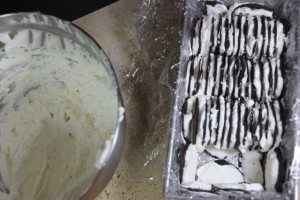
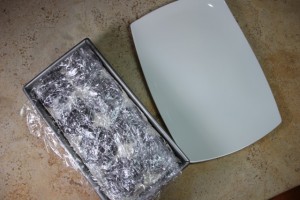
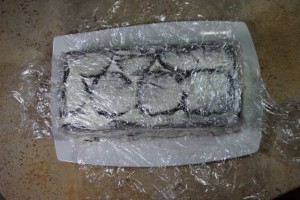
I filled in the spaces between the stacks with additional whipped cream and then put a final layer of cookies on the top (bottom) of the came. Ice this with a thin layer of whipped cream, lay the edges of the plastic wrap over the cake and refrigerate for 3-4 hours.
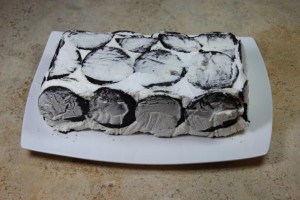
I used a pastry bag fitted with a large star tip because it’s a fast and easy way to make the cake look extra special You certainly don’t have to use a pastry bag and can simply put a final layer of whipped cream around the outside of the cake using a large offset spatula like my stepmom always does.
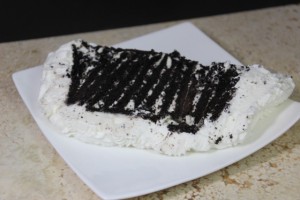
Because of the fresh whipped cream, this cake is best within the first day of making that, after that it may get a little weepy and soggy, but it will still taste good!
 Print This Recipe